Showing posts with label one pot. Show all posts

Monday, February 24, 2020

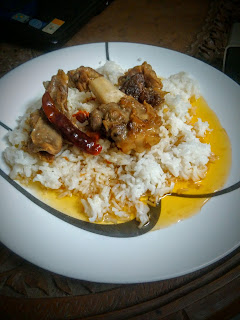
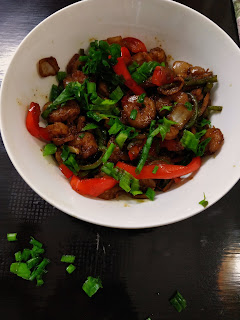
Brigadier Fernando's Spicy Prawns

Who says army guys can't cook? Some of the most lip smacking dishes have been served up by the faujis in my life. All of them instinctive, adaptive and creative cooks! Brig Fernando, or Neville Uncle as I fondly call him, is no exception to this trend. 
I was all of 10 when I met him first. I spent most of that visit hiding behind Dad's legs. Too shy to talk. But I did follow him around the kitchen as he cooked up a lavish Sri lankan style feast. And that is the memory that endured over the years. His jolly commentary as he chopped, marinated, extracted coconut milk. Smiling, coaxing and dispensing cooking tips that I remember still. It is hard for me separate Neville Uncle's memories from the kitchen.
I was thrilled when he made a second trip to India in recent years. Technology made it easier to keep in touch. And when I needed some spicy carnivore recipes to add to my repertoire, I knew whom to call! After all, the taste of his Sri Lankan Chicken Curry still lingers on! Neville Uncle and Senophi aunty happily shared some of their family favourites. Among them all, these spicy prawns have become a staple at mine!
These super easy, super delicious prawns are Uncle's original creation. And I guarantee they will soon be a staple at your table as well! Presenting it here in Uncle's own words.

SPicy prawns

INGREDIENTS:
500 Grams cleaned medium size prawns.- Clean the prawns keep the tail intact.
2 Table spoons each of Ginger and garlic.Cut into thin strips.
2 Bombay onions cut into small cubes.
1 Table spoon Chilly paste or chilly flakes
2 table spoons light Soya sauce.
3 table spoons margarine or butter or even cooking oil.
2 full tea spoons crushed black pepper.
Spring onions to garnish the dish.
1 tea spoons of salt.
1 each of red pepper and green pepper. Cut into strips.(this item is optional).

METHOD:
Wash the cleaned prawns in saffron and salt water.Pat dry and keep aside.
In a non stick pan,  pour the butter or oil.
When oil is hot, add the ginger and garlic strips and fry  for 2 or 3 minutes.
Now add the cleaned prawns and fry for approx 5 to 6 minutes.
Now add the onions and green and red peppers.
Now add the crushed black pepper and salt.
Fry for a minute or two.
Add 2 table spoons of light Soya sauce.
Add the chilly paste or the chilly flakes.
Transfer the prawns to a plate and garnish with 1 inch pieces of spring onions.
PRESTO Brig Fernando 's dish is ready.
Enjoy with yellow rice or bread.

Pl note if you want the dish to be slightly wet add half cup of thick coconut milk just before taking off the fire and fry for 2 or 3 more minutes.
Sunday, April 8, 2018

Beer Chocolate Cake

I've been experimenting with beer in my cooking and baking for a while now. I don't drink much of it coz it leaves me sleepy and bloated, but I do love the mild bitterness and depth it adds to food. Before I started the marathon experiments, I had only a layman's knowledge of beer. Pop a can or pull a draught at the microbrewery and really all beer was the same! Right? Wrong!! 
I actually got talking to a brewmaster and was boggled at all the subtleties and methods that differentiate each brew. Roasting, hopping, brewing, maturing... they all combine in limitless combos to bring the perfect aaahhh to your sip! 
When I baked my Beer Bread, I was completely clueless and just reached into the fridge for a Bud. But this time round I was better educated, and now that I understood the flavour profiles, i was confident of pairing the right beer with the right ingredients. 
This particular cake uses the English Brown Ale. The dark colour boosts the chocolate tones. And the roasted nutty malts carry an undertone of chocolate that just enhances the taste of the cake to an altogether different level. 
The best part about adding beer to your bakes is the texture. This cake in particular has a gorgeous moist crumb that makes you just reach for slice after slice. If you think I exaggerate, just bake a batch and try for yourself! 
Now I wish this was an original recipe, however, my inspiration comes from The Beeroness. I tweaked a few ingredients around. Added some and subtracted a little. After all, what's life without a little twist?!


Ingredients:
Eggs                         1
Butter                       1/2 cup
Granulated sugar     1 cup
Muscovado sugar    1/2 cup
Vanilla essence        1/2 teaspoon
Ginger powder        1 teaspoon
Beer                         3/4 cup
Oil                           1/4 cup
Flour                       1 1/2 cups
Cocoa Powder        3/4 cup
Baking soda           1/2 teaspoon
Salt                         1/2 teaspoon

Method:
Pre heat the oven to 180 C. Sift all the dry ingredients together. Beat the butter and the two sugars till pale and fluffy. Add the egg and the essence. And beat well. Gently stir in the beer and oil till combined. Do not beat or the beer will get too flat. Now fold in the dry ingredients a little at a time. Gently mixing till all is just combined. Pour into a well greased cake dish. Bake for 60 minutes. Let cool a little before cutting in!

Tuesday, October 24, 2017

The Leftovers Cake

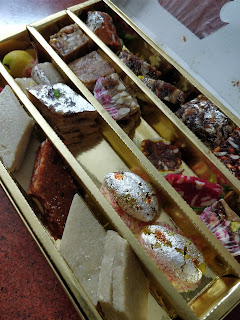
The Diwali frenzy has died down. The diyas have been washed and stored away. The fairy lights have been brought down and carefully returned to their boxes. The din of the crackers had quietened. The belts have loosened a notch. And the fridge is groaning under the weight of the mountain of mithais!
While we wait an entire year to indulge in these special Diwali sweets, the week long exchange makes us groan at the sight of yet another laddoo or barfi
Short of giving it away or crumbling it into yet another kheer or dessert, there aren't too many options around. But this year I decided to be inventive!


While the overdose of mithais had everyone gagging sweet, the realm of cakes had been untouched. If I could reinvent the barfis into a less sweet, unconventional tea cake, I was sure it would  find many takers. 
My inspiration came from the delicious Mawa Cake. This east meets west fusion was perfect for the cake I had in mind. After all, most mithais had a generous base of mawa to complement the dry fruits tucked within. Armed with a random mix of Kaju katlis, anjeer barfi, pista rolls and lavang latikas I set out to bring my experiment to life.
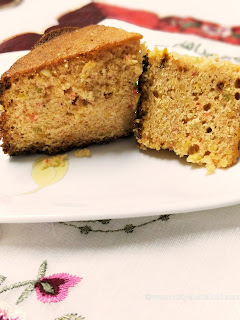
The result you ask? This gorgeous golden hued, light as air cake. The crust was crisp and inside was all soft sweetness. Redolent with the fragrance of mawa and dry fruits, this cake was an instant hit with the young and old alike. People came back for seconds. And thirds! Dipped into tea. Warmed for a quick snack. Topped with shrikhand for a rich dessert. This was definitely the most versatile product of my Diwali Leftovers! 
My fridge is emptied of all the excess mithai that lay unwanted. And I have a house filled with cake satiated tummies! Now if only someone can find a way to recycle all that Son Papdi!


nutsaboutfood

Ingredients:
Leftover Mithai                200 gm
Maida                               200 gm
Butter                               200 gm
Powdered Sugar               150 gm
Cardamom powder          1/4 teaspoon
Baking Powder                1 teaspoon
Eggs                                 4

Method:
Pre heat the oven to 180 C. Beat the butter and sugar well, till it is light and fluffy. Mix in the crumbled mithai. And beat well, till the batter is smooth. Sieve the maida, cardamom powder and baking powder and fold into the batter. Beat the eggs and incorporate into the batter. Mix everything well to get a smooth, consistent batter.
Alternately, if effort is not your thing, just whizz everything together in a food processor or mixie. Pour into a greased baking tin and bake for 45 minutes till a skewer inserted comes clean. Cool and slice!

Tuesday, August 1, 2017

Almond Cheese Spread

We shook off the snow and tumbled into the house. We were cold and hungry. And you know what's my comfort food on a cold, snowy day? Hot, buttered toast! Nothing can make me feel as good. So aunty put the griddle on and liberally coated it with butter, placing two slices of bread to crispen to that beautiful gold. 
When she flipped it over to the other side, I thought we were almost done. But, nope! She had an ace up her sleeve. She dolloped on some cheese spread and let it just melt into the crisping toast. Dotted with ketchup. And then judging my impatience correctly, let me wolf it down straight from the pan.
I waited for the salty, slightly plastic cheesiness of store bought spread to hit my tastebuds. But instead was surprised by subtle flavours so generously complimenting the creamy goodness that could only come with homemade love!
It was so good, I wolfed down six toasts before my foodie brain could form the words, " May I have the recipe, please?"
That was 12 years ago, and I still slather this spread with the same reverent wonder. For me it has the same joy as my grandma's home made white butter. Another dairy addition to my toast I can't get enough of!
Another good thing about this cheese spread is that it sneakily incorporates the wholesome nutrients that  growing tots may screechingly run from. But ever know a kid to turn down cheese and toast? Nope! So say hello to our hidden superfood friends- Almonds and Garlic. Even Keto Hubby gave the spread a big thumbs up! It was just the thing he needed to jazz his Keto Bread :)
So I'll go steal a spoonful from the jar, while you go whip up your own batch of yummy health.


Ingredients:
Cheese           200 gm (grated)
Cream            1/2 cup
Milk               1 cup
Almonds        20
Vinegar          1 tsp
Sugar             1 tsp
Red Chillies   5
Garlic             5
Pepper           1/4 tsp

Method:
Soak the almonds and red chillies for half an hour. De-seed the red chillies. Remove the skin from the almonds and discard the water. Run the almonds, chillies and garlic in the mixie to make a coarse paste. Add the rest of the ingredients and blend till smooth. Refrigerate and use within a week.

Notes:
I used fresh cream (malai) skimmed off the top of our milk. You can use packaged cream as well. 
Since the chillies are soaked and de-seeded, they are not spicy and are mild enough for kids. You can however reduce the chillies if you like.
For the Keto version replace the sugar with Stevia. 

Thursday, February 16, 2017

Keto pork

Love is in the air. As are chocolates and all things sweet. Now I could make a grand Valentine gesture with a cake. But that would be more for me than Hubby Darling. He's never had a sweet tooth, and now that he's on Keto he happily gives desserts a miss. 
He does ecstatically indulge in his favorite foods, though. The ones that make Keto a dream diet for him. Over the past few months, we've been happily experimenting with varied versions of deliciously rich meats. And the most Keto friendly has been Pork. Needless to say Hubby is over the moon! The Goan Pork Sorpotel had been a firm favourite, but we've had to retire that as it wasn't very keto. That left us with the Arunachal style and the mince with spinach. Now Hubby doesn't mind eating the same day in and day out, but how could I let this creative challenge slide?!
Inspired by the simplicity and clean flavours of the Junglee Maas, the Keto Pork was to take a similar direction. Only this time I wanted the flavours to be fresher, sharper. And also closer to the Bhutanese Ema Datshi. 
The Keto Pork has minimal ingredients that are easy to find and yet maximize the taste. It has a familiar warmth reminiscent of Maa ke Haath ka khana. Even if your Maa didn't cook pork! Like most recipes, this one is pretty adaptable. If pigs make you squeal, use meat or chicken. Just amp up the fat factor as they don't have the same amount of fat as our Oink Oink! You can tone down the chillies. Swap the herbs. Play around and make the flavours truly your own!


Ingredients: Pork with Fat                      1 kg
                      Ghee                                   8 tablespoons
                      Green Chillies                    20
                      Garlic with green tops        12
                      Coriander leaves                 1 bunch
                      Peppercorn                          20 (coarsely crushed)
                      Salt                                      to taste

Method: Grind together the green chillies, garlic and coriander. I prefer it coarse for a rustic flavour, but you can keep it as coarse or fine as you like. Heat the ghee in a heavy bottomed pan. Add the pork pieces and saute till the edges turn a little crisp and golden. Add the rest of the ingredients and mix well. Add water just below the level of the meat. Turn the gas down to sim. Cover and cook till done, stirring occasionally. Soup it up or chow down with some cauliflower rice. Happy Ketoing!


Tuesday, January 10, 2017

Kheer Komola

The new year is upon us. A whole 365 days filled with opportunities. And given the blogosphere trend, this post should be about resolutions and hope. But I am perennially optimistic and I really don't do resolutions. If I did I would have long ago vacated my warm couch, and walked out battling the real world. Instead I choose happily to sink further into my warm spot, snuggle my dog and monster munchkin closer and go tap tap on my browser.
Its not that I don't like interacting with the physical world. It is jus that I am plain lazy! I remember when my friends raved about the benefits of retail therapy, all I could think was why anyone would abandon their pajamas and blanket to battle crowds and look at racks and racks of the same boring stuff!
Then online shopping came along and my brain went Aah! This makes more sense. So there I was indulging in some post festive, end of reason sales therapy when I chanced upon Santrawale. They sell, well, oranges! Not just any oranges though. Organic, sustainable, sourced from farm oranges. They had me at Organic! So tappity tap and I had two dozen juicy Nagpur oranges on their way. 
Now if you've browsed my previous orange post you will know that I was suddenly struck with the question again. What the heck do I do with all those oranges. The marmalade batch was still going strong so that option was out. Wine was option two. But that was really a long term project. 
The new year demanded a new approach. (There I've done my bit of following blog trends) I needed something different. Something unexpected. Out came the journals and cookbooks. 
Kheer Komola popped up twice. Milk and Oranges? Sounds like a recipe for disaster right? And yet there were people out there enticing me to give it a swing. It was too cold for a souffle, but a dessert was definitely on my mind. Did I dare to try? 
It wouldn't be my first attempt at Orange Kheer, to be honest. A long time ago I had ignored mum's words of wisdom and experimented for a dinner party I was hosting. The recipe had been tried and tested by Good Housekeeping so what could possibly go wrong? Plenty, as it turned out! Instead of the refreshing, creamy dessert I ended up with a bowlful of dense gloop with a bitter aftertaste. To their credit, my guests actually ate their dessert and assured me it wasn't that bad. That disaster still loomed large in my food memories. And I do have this annoying need to conquer all peaks. So I geared up for round two of Kheer Komola challenge.
This time I was better prepared. I turned to friend Google and read every variation I could find. I said a short prayer. Brushed aside mum's skepticism and dad's ribbing. Nothing ventured, nothing gained. Ignoring the monster munchkin's calls I concentrated completely on my kheer karma. And it paid off! I was finally rewarded with a creamy yet light dessert that brought with it the promise of a refreshing spring with its delicate citrus touch. (Yes I can poetically romance food.) This was Kheer Komola the way I had imagined it. And so you can put away your search results. Go on and benefit from my Experiments with Oranges! And be prepared for friends and folk to be wowed by your brave and unusual dessert masterstroke.


Ingredients:
Milk                              2 litres
Oranges                         7
Sugar                             10 tablespoon
Green Cardamoms         5 or 6
Saffron                           a few strands

Method:
Heat the milk in a heavy bottomed pan. Once it boils, reduce the flame to the lowest and let it simmer. Soak the saffron stands in a tablespoon of the warm milk and keep aside. In the meantime, separate the segments of the oranges. Carefully, split the segment and discard the thin outer membrane. The white membrane is what caused the bitterness in my previous attempt. Remove all seeds as well, taking care to preserve only the pulp and juices of the oranges. It is a monotonous and exacting task, but then that's what makes this kheer so special. It is actually a labour of love! Powder the cardamoms, and don't forget to stir the milk every once in a while, scraping the bottom to ensure it doesn't stick and burn. Once the milk has reduced to less than half the quantity, blushing with a creamy hue, stir in the sugar, cardamom powder and the saffron soaked in milk. Let it simmer for another five minutes and then turn off the heat. Let the milk cool to lukewarm and then gently stir in the orange pulp. Allow the milk to be infused with the citrusy goodness overnight or for atleast four hours, If you are in warmer climes, serve this chilled and topped with pistachios. If like me you are freezing and need a reminder of the spring to come, serve the kheer at room temperature. And if like my father you want everything piping hot, just zap a bowlful in the microwave for 30 seconds. Either way, you won't be disappointed. 


Thursday, December 8, 2016

Not Just Any Hot Chocolate!


Growing up on a healthy diet of Enid Blytons and Archies, I was besotted by the seemingly exotic Hot Cocoa. Sipped steaming with a tossing of marshmallows, seated on a warm rug in front of a roaring fireplace. A dog cuddled next you and a throw carelessly wrapped around the shoulders. Really, that was the romanticism of winter for me. I dreamt of staring out the window, watching the snow fall softly as I warmed my palms on my very own cup of Hot Cocoa, the aroma of chocolate wafting through my senses. 
Mum didn't laugh off my fantasies. She indulged me with her shorthand version of the Hot Cocoa. But warm milk with drinking chocolate just didn't have the same magical feel. Dad would add a capful of brandy and insist it was the secret ingredient to that elusive taste. But sigh! My literary tastebuds weren't fooled!
Many snowfalls and failed milky cocoas later, I found it! As Nigella beamingly stirred her pot of hot chocolate, I knew it was The One! I could almost inhale the aroma through the telly. And I wasn't wrong. I made it the very next evening. And as we sipped it under the wintry stars, my chocoholic cuz agreed every sip was a trip to heaven. We had found the Hot Cocoa of our literary dreams!
Over the past few years, I've played around with the flavours, tweaking it a lil here and there. Made it truly my own. And as the winter chill nips my toes, I tuck em under my snoring dog, pull my Naga shawl a little closer and revel in that warm, molten chocolate dreamily making its way down my throat. The magic is alive. And this is Not Just Any Hot Chocolate! 


Ingredients:
Milk                            2 cups
Dark Chocolate           100 gms, chopped or shredded
Cinnamon                    1/2 inch stick
Brown Sugar               1 teaspoon
Vanilla Syrup               1 1/2 teaspoon
Peppercorn                 4, crushed coarsely
Rum                            1/4 cup

Method:
Pour the milk, chocolate, peppercorns, sugar and cinnamon into a saucepan. Heat on the lowest flame till the chocolate dissolves completely. Take off the heat and add the rum and vanilla syrup. Whisk well. Strain and get ready to be transported to Chocolate Heaven!

Notes: I used Monin Vanilla syrup but you can easily replace it with vanilla extract mixed with honey. And if you want a more decadent experience, substitute half cup of milk with Amul fresh cream :) 


Saturday, October 15, 2016

Junglee Maas


My grandfather was eighty plus when one fine day he loaded a rucksack into the back of our jeep. Picked up an old army pal of his and drove straight across the country, from the south to the north east. We had no clue where he had gone or when he would be back. A month later he returned, with a rejuvenated laugh and a twinkle in his eye. And a huge wild boar in the back. Ready to be skinned and pickled.
Shikaar! Aah! That word throws up romantic images of tough men on horseback or open jeeps, rifles slung on the shoulders, tracking the elusive beast through dense jungles. Fearless and focused. Images of late night campfires and rustic food. Smells of sweat, rum and meat mingling with the smoke and the cool night air. 
I've never been on a shikaar or hunting expedition. But the vivid recollections of my father and grandfather transport me to those adrenaline fuelled times. When being true to the roots also meant being in touch with the most basic survival skills handed down by the primitive tribe. 
Hunting expeditions often lasted for days and meals had to be rustic and basic. Carrying fancy ingredients was out of the question. The meat was shot fresh and the only spices used were those that would not perish in the punishing heat. Out of these expeditions was born the hunter's Junglee Maas. A one pot dish with no frills and just a wholesome meaty flavour. High on calories and protein, this was the perfect meal to energize travel weary bones and sore muscles.  


The original recipe calls for ghee, red chillies, salt and of course, meat. The resultant dish is a mildly spiced, juicy and tender meat, crowned by a flaky and crisp exterior. A contrast that delights with every bite. The gravy is thin with a buttery goodness. And if you make it under a starry sky on an open fire, the smokiness from the wood will elevate it to a whole other dimension. 


Ingredients:
Goat Meat                 1 kg
Dry Red Chillies       20
Ghee or Butter          250 gm
Salt                            to taste

 Method: Melt the ghee/butter in a deep pot. Add the meat and the red chillies and cook for a medium flame till all the pieces are generously coated with the ghee. Add the salt and just enough water to reach the level of the meat pieces. Reduce the flame and cook covered till the meat is done. Stir occasionally, adding water if the dish starts to dry. Slurp it like stew, soak it with bread or serve up with some steamed rice.


Friday, September 16, 2016

Chocolate Rum Cake


Drunk texting? Sure! We've all done that at some point of time. But drunk blogging? Well, that's definitely a first for me! Blame it on my mum's birthday. Yes, you read that right! Its my mum's b'day and her b'day cake that's gotten me here. Not that I am complaining! I could probably go for a couple of slices more, though the blurred edges of the words warn me otherwise.
Let me start by saying that my mum's favorite present are those beautiful boxes of dainty liqueur chocolates. With very little time to shop, I am embarrassed to say I came up with naught. This would have been acceptable had I a heartwarming present on standby. But alas! I failed there as well. So I thought of the next best thing. Make her some liqueur chocolates. And as my brains unfroze they decided to take it a step further. Chocolate and liqueur in a cake. An all in one dessert! 
Now it would have been great had I stuck to the thought and used one of my regular recipes. But no when you go big, why not go grand?! That's when we went from dainty to drunk! In my quest for the best ever chocolate rum cake, Google kept pointing me towards the Caribbean inspired dark chocolate and rum cakes. And the more I read, the more I knew I just had to make the most chocolatey, most boozy ever rum cake. Decadent and degenerate. 
Enter the recipe on foodinmybeard. After having devoured hundreds of rum and choc recipes, I can honestly say that this was hands down the booziest and easiest cake around. I knew I wouldn't rest till I made it. And well, ate it! Now the cake came out of the oven looking all normal and innocuous.
 

And then it was subjected to this. Now the bottles on top are merely to add weight to the lid, and don't actually form part of the recipe. But below the lid is a sinful, booze addled rum butter sauce that with the extra weight squishing it down, permeates every crumb of an already very rummy cake. The result? Drunk Blogging!

Ingredients:
Dark Chocolate Compound     170 grams
Butter                                       1/2 cup
Dark Rum                                1 cup
Flour                                        1 cup
Eggs                                         4
Sugar                                       1/2 cup
Brown Sugar                            1/2 cup 
Baking Powder                        1/2 teaspoon
Baking Soda                            1 teaspoon
Cocoa Powder                        1/2 cup
Salt                                          1/2 teaspoon

Rum Butter Sauce
Butter                                      1/4 cup
Sugar                                       1/4 cup
Dark Rum                                1/4 cup + 1/2 cup

Method:
Microwave the butter, chocolate and rum for 30 seconds. Whisk. If it hasn't melted completely, microwave again for 30 seconds. Whisk till smooth. Add the sugars and whisk well. Now add the eggs one at a time, whisking well after each addition. Sift all the dry ingredients together. Add half the dry mix to the wet batter and mix well. Now add the rest and mix till combined. Preheat the oven to 180 C. Pour the batter into a greased and lined cake tin. Bake for 45 minutes or till done. Once the cake is done, take it out and poke holes all over with a toothpick or skewer. Gently pour over the entire butter sauce. Cover with a lid that touches the surface of the cake, and weigh down with additional bottles. Once the cake cools completely, flip onto a serving tray and for once, you can drink your rum and eat it too!
Rum Butter Sauce: Heat together the butter, sugar and 1/4 cup of rum. Bring to a boil and let it boil for a minute more. Take off the heat and whisk in the remaining 1/2 cup of rum. Pour warm over the cake. This is the lethal weapon that turns your cake from decadent to drunk! 

Sunday, September 4, 2016

Meat pickle

I can't stop dancing. Or singing. Its that time of the year finally! Time for my annual vacation home. Three weeks of doing absolutely nothing. Three weeks of being completely pampered by mum and dad. And three weeks of gorging on all my favourite food, cooked not by me, but by mum, granny, aunt and my darling Robert uncle! And yes, I absolutely aim to overindulge!
Last Sunday as we sat making plans for the upcoming vacay, Hubby Dear issued a dire warning against pilfering his share of the meat pickle this year. You see, every year when we go home, Mads Masi bottles a jar of the most sinfully addictive meat pickle, exclusively for HD. It was great in the earlier years when I was following a vegetarian diet. But then I returned to the meat fold, with a vengeance! So when last year's batch made its way to us, HD was none to happy he had to share. But imagine his disappointment a couple of hours later when he poured himself a chilled beer and headed to spoon a few pieces of his favourite snack. The pickle jar was empty! In my defence, running after the monster munchkin all day is hungry work. And did I mention the pickle is sinfully addictive?!
He was of course mollified when Masi bottled a batch specially for him and I swore to keep my fork away. 
The memory though, remained. Hence, the dire warning! And that was what led to my sleepy sunday turning into a sweaty one. Ever had one of those moments when you share a food memory and the description is so vivid you can almost taste it in your mouth. And so strong is that sensation that you just have to have it. Like right that moment. Or your tastebuds will drive you nuts as you drool unchecked?! Well, lets just say we needed our meat pickle fix. Right that moment. A week was too far away!
A frantic call to Masi for the recipe and we were raring to go! The only hitch? Goat's meat wasn't available! But as my friend said, Baa ain't too far from Oink. So pork it would be! The promise of that tangy, tasty pickle spurred everyone into action. HD took off to bring us the choicest cuts. And Oink Friend helped peel, chop, grind and stir. And stir. And stir! And...excuse me, while I go polish off that last forkful ;)


Ingredients:
Meat (boneless)       1 kg (goat/beef/pork/lamb)
Mustard oil              1 1/2 cups
Ginger                      100 gms
Garlic                       125 gm
Vinegar                     1/3 bottle
Sugar                         a pinch
Garam Masala          1 heaped tablespoon
Salt                            to rub

Method:
Wash the meat well and rub the pieces with salt. Keep aside for two hours. Grind the ginger and garlic to a fine paste. In a heavy bottomed pan, heat the oil on high flame and saute the meat. When the pieces start shrinking, and the meat is half done, add the ginger garlic paste. Reduce the flame to the minimum. Add cook till the meat is done. Stir frequently in between to ensure the meat doesn't stick to the bottom of the pan. Add the sugar and garam masala and cook for another five minutes. Let it cool for 1/2 an hour. Stir in the vinegar and store in sterilized jars. If the weather is warm, it is better to keep the pickle refrigerated. It will keep in refrigerator for a couple of months. Provided of course, you have the willpower ;)

Monday, August 1, 2016

Wine


There was a lot of backlash for my previous post. Homemade raisins? My friends and family couldn't believe I would waste precious grapes like that when instead I could have used them for more intoxicating purposes! To them I say, Fear Not! Of course, everytime I have a stockpile of grapes, the first thing I do is ferment a batch of my very special wine.  
You could say wine making is in my genes. My maternal grandmother did a professional course in food preservation, and with all the jams, jellies, pickle and marmalades, she also made vast quantities of sweet red wine. Bottles of which made an appearance even twenty years later. It is another matter though that being a teetotaller she never tasted a sip of the stuff. The rest of us, well, we were a 'happy' bunch! 
My paternal grandfather was quite the vintner as well. He was more experimental and apart from grapes, also distilled beetroot, carrot, apricot and mixed fruit wines. He was also known to brew his own beer at times. But that's a tale for another post. 
It comes as no surprise then that every year I distill a few bottles of the potent stuff for my friends and lazy sunday brunches. If you think wine making is complicated and time consuming, you are wrong. It really is the simplest. And requires very little effort on your part. After all, Nature does most of the hard work. 

Ingredients:
Grapes       2 kg
Sugar         1 kg
Yeast          1 tsp
Water         just enough to cover the grapes
Rum           1/2 cup (optional)

Method:
 Remove the stalks of the grapes and wash them thoroughly. Put them in a large glass jar with a wide mouth. Pour the water and mash the grapes coarsely. You can use your fingers or a potato masher. Add the sugar, mix and keep in a cool, dark place. Make sure the lid is secure. The next day, add the yeast to 1/4 cup luke warm water. When it froths, mix into the grapes. Cover and return to dark place. Let it stand for 21 days, ensuring you stir it with a clean, dry spoon every two days. On the 21st day, strain through a muslin cloth and add the rum. Pour into clean, dry and sterilized glass bottles. Store in a cool, dark place and leave to mature for two months. After two months, call over your friends and uncork a bottle for some good times!

Thursday, July 14, 2016

Homemade Raisins


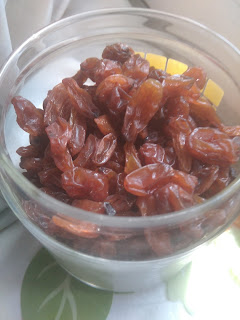
Its been a while that I've posted on the blog. That didn't mean I wasn't experimenting and turning my kitchen into a lab! The last I posted I was working my way through a large batch of oranges. Well, the oranges met a delicious end. And then came the avalanche of grapes. They found their way onto salads and fruit cream and the monster munchkin's snacks. But just when I thought I was done with them, a whole new bunch would make it to my fridge. This needed large scale tackling and I figured let me save them for a rainy day. Now the only way to make them last intact till the aforesaid rainy day was the sundried way aka raisins.
Now, i am a raisin phobe. Cannot abide those slimy squishy things in any dessert or cake. But hubby dear and monster munchkin like em well enough. And they are great for zinging desserts when we've got company. I trawled the net for various recipes and in the end settled for one I found between the yellowing pages of the first recipe diary I started at the age of ten! It is simple and requires practically no effort from my end, And a few glorious days later, I get rewarded with glossy, granola worthy raisins. It was almost like Farmville all over again!

Ingredients:
Seedless Grapes     1 kg
Water                      1 litre
Milk                        1 tablespoon

Method:
Remove the grapes from the stalk and wash them well. Boil the water and milk together in a deep pan. Add the grapes and continue boiling till the grapes turn a lighter green. Drain well in a colander. Spread out on a thin cloth under the sun. Cover with another thin muslin. After three to four days of bright sunshine, voila, the grapes are now golden raisins!


Monday, April 25, 2016

Pork Sorpotel

My earliest memory of my uncle was of a tall, mustachioed guy with a booming voice. It was dislike at first sight. How dare this loud creature take my delicate Masi away from us. I clambered furiously up to my aunt's arms and declared. " Masi iss aadmi ke saath nahi jayegi!" (My aunt shall not leave with this man!) No one paid heed to my decree. And for that i am grateful!
Over the years I came to adore him. He was a madcap friend with a great taste in music and a shared love for PJs and puns! He was a neatness freak who drove us crazy. He was the life of the party, always up for a pint. And he was a insatiable foodie who was also a fantastic cook!
Sunday afternoons at his place usually meant beer, conversation and pork. Cooked with his meticulous perfection and served with a whole lot of love. When I started my food blog, he was always the first to leave a comment. He was my testbed for some of the more experimental recipes. And he always complained that I didn't devote enough space to his favorite red meat!
The last time I met him, I promised I would perfect my skills and wow him with the ultimate pork dish. And I did! Perfect it. But I still needed his final approval on it. I clicked a pic and sent it across. He texted that it looked tempting and he was looking forward to the taste test. Alas! That shall never be. He was taken away too soon, too sudden.
This post is in your memory my MeshoMoshai ( I can see your eyebrows shoot up and your mouth hang in shock at that traditional address!) I guess I'll have to wait till I join you up there for your seal of final approval. Till then, I know you look down and send me all the love and luck. And plentiful beer to go along with this spicy Pork!


Ingredients:
Pork                        1 kg
Red Chillies            25
Coriander seeds      1 tablespoon
Peppercorns            15
Garlic                      10 cloves
Cinnamon               2 inch
Tamarind                an onion sized ball ( roughly 5 tablespoon)
Turmeric                 1 tsp
Cumin                     4 teaspoon
Onions                    4
Green chillies         6
Ginger                    2 inches
Vinegar                  1/4 cup
Sugar                     1/2 teaspoon

Method: 
Finely chop the onions, ginger, garlic and green chillies. Grind together the rest of the ingredients except pork and sugar. To the pork, add just enough water to reach the level of the meat. Boil pork till it becomes light pink in colour. Add the ground masala, the chopped ingredients and salt to the pot. Pressure cook for 30 minutes. Once the cooker cools, add the sugar and thicken to the consistency you like. Serve hot with steamed rice and chilled beer!


Tuesday, March 15, 2016

Orange Whiskey Marmalade

The markets are flooded with oranges. All shapes, sizes and sweetness. Tempting you with their fresh, springtime aroma. Tempting enough for hubby to haul home an entire crate! Its been a week, and there they lie, begging to be devoured.
Unfortunately, the only fruit enthusiast at our place is the monster munchkin. And frankly, I am terrified he'll choke on the pips. And no, I am far too lazy to sit patiently and peel and de-seed the segments. Let him be content with kiwis, plums and berries for now.
That still leaves me with a crateful of oranges that no one wants to eat. Its not warm enough for a fruit salad or even juiced oranges, so I decided to take the route less travelled. Do I dare to attempt marmalade?
My past efforts at jam making have always resulted in mushy, oversweet pulp. Do I dare subject these vibrant citrus to what may result in another failed attempt? Aah! But you already know the answer to that! I dared!
I dared and am I glad I did! I am always a sucker for good marmalade. But good home made marmalade? Sheer heaven! And I thought to myself, if I am going to dare, why not take it a step further? Even if it meets a disastrous end, I have a warm cocktail to drown my defeat! So now I present, not just any marmalade. But an easy, super delicious home made Orange Whiskey Marmalade!


Ingredients:
Oranges       1.5 kg
Sugar           1.2 kg
Lemon         1
Whiskey      150 ml
Water          6 cups

Method:
Wash and halve the oranges. Juice them using a citrus juicer. Slice the empty peels into thin strips, discarding any pips you may find.  Place an empty saucer in the freezer to chill.  In a heavy bottomed pan, throw in the sliced peels, the strained orange juice and the water. Bring to a boil. Reduce the heat to the lowest setting, cover and cook for about 30 minutes, Once the peel turns translucent and soft, add the sugar and lemon. Stir till the sugar is dissolved. Let the mixture come to a boil again and then continue to simmer, stirring every ten minutes, After about 50 minutes, the mixture will start becoming translucent and jelly like. Bring out the chilled saucer and place a drop of the orange mix. Return the saucer to the freezer, After three minutes, push the chilled drop on the saucer. If it wrinkles, the marmalade is ready. If it is still liquid and sliding, let the mix cook for another three minutes before testing on the chilled saucer again. Once the marmalade is ready, turn off the heat and stir in the whiskey. Pour into sterilized glass jars and allow to cool to room temperature before putting the lids on. Store in a cool place, or refrigerate for upto six months. 
Go ahead and dare today! Hey! If I could finally break my jam jinx, so can you!


Tuesday, February 9, 2016

Quickie Dahi Chicken


I love my new kitchen! It is large enough for monster munchkin to potter at one end, whilst I experiment and blog at the other. Of late though, he hasn't been content just stirring empty pots. He often wanders over to my cooking area demanding, " Mamma, Up!", to get a closer look at all the bubbling and sauteing. Do I have a chef in the making? Too early to say. But this recipe is definitely the munchkin's brainchild. I dare take no credit for it.
As I stood staring at the chicken, wondering just what treatment I mete, the lil one coolly sauntered over insisting I take the onion he had brought. He kept going back and bringing ingredient after ingredient. All I had to do was put it all in the mixer and let him grind the masala dancing on his tiptoes! Thus was born the quickest, most delicious chicken I have ever tasted. But don't  take my word for it! Give it a whirl and I am sure it will become a permanent in your repertoire. After all, even a two year old could whip it up ;)

Ingredients:
Chicken                          1 kg
Curds                              1 cup
Onion                              1, large
Garlic                              6
Green chillies                  6
Dessicated coconut         1/4 cup
Water                              1 cup
Mustard oil                     2 tablespoon

Method:
Grind the onion, chillies, garlic, curds and coconut together. Heat the oil in a pressure cooker, Add the ground masala. Cook for two minutes. Add the chicken and salt. Stir well till all the pieces are coated. Add the water and pressure cook for four whistles. Told you it was a quickie!

Note: Dessicated coconut is also know as dry coconut powder or nariyal bhoora.


Wednesday, January 20, 2016

Mom's Onion Soup


Onion soup? I know the name doesn't conjure visions of heartwarming, delicious, soul stirring food. But contrary to what most people think, the humble kitchen staple morphs into a flavourful gourmet extravanganza for the taste buds. The French Onion soup is sought after across the world, and features on the menu of some of the best chefs. 
The original Onion Soup calls for beef stock and cream, and is topped with generous amounts of grilled cheese croutons. Not too healthy for the heart or waist, i agree! Thus, presenting, Mom's Onion Soup. Her version still retains those gorgeous golden caramelized onions, but the rest of it is simple, light and infinitely more healthy. I warn you though, this soup is super addictive. Just ask hubby. He's put in a permanent request that mum make two extra mugfuls for him each time! Coz as they say, " No one can drink just one!!"

Ingredients:
Onions            4, large
Butter              2 tsp
Milk                2 cups
Water              2 cups
Peppercorn     10
Salt                 to taste

Method:
Heat butter in a pressure cooker. Add chopped onions, Saute till the onions are golden. Add the rest of the ingredients and pressure cook for 4 whistles. Cool. With a slotted spoon remove the onions and peppercorns and grind them in a mixer. Add the paste back to the liquid and heat on low flame, just before serving. Yes, it is that simple! And if you are feeling particularly indulgent, serve up with a side of grilled cheese toast ;)


Thursday, December 31, 2015

Mulled Wine


Christmas has just passed and already the new year is upon us! Seems like yesterday that we were ushering in 2015, and now its time to bid it adieu! But there is no sorrow in that. The year has been fair and the new one just offers more to look forward to. For now, I sit back and enjoy the festive air that warms the chill in the wind. I love the happy, carefree feel that comes this time of the year. When we all shed our baggage and Ho Ho Ho our thoughts and speech. It is also the time of year when the vodkas and martinis and sangrias gave way to the more traditional. Tis the season to be jolly... with mulled wine warming my belly! The warm spiced wine gently making its way down my throat. Clearing that lingering cough and cold. Enveloping me in the warm, fuzzy Santa hug. And of course, the best way to use up all that cheap wine languishing at the back of the cupboard! So mull yourself some wine. Pour one for you and yours and wish everyone with all the cheer. Happy New Year guys! Make every moment count!

Ingredients:
Water                             2 cups
Sugar                              1/2 cup
Cloves                            12
Cinnamon                       2 inches
Nutmeg powder              1/2 tsp
Dry Ginger Powder         1/2 tsp
Lemon                             1/2
Red wine                         750 ml
Brandy                            1/4 cup

Method:
Heat water in a pan. Add sugar, spices and lemon. Reduce heat before it comes to a boil and simmer for 10 minutes. Add wine and heat till just below boiling point. Now add the brandy. Turn off the flame. Serve warm in goblets and inhale the festive spirit!

Monday, December 21, 2015

Oil Free Chicken Raja Mircha


  • Those who have been following this blog would have realized that I am rather partial towards food that is light, wholesome, simple but packs a flavourful punch. This new recipe is no exception. I found the original on soulkitchendiaries and knew it was just what I needed to kickstart the winter weekend on a healthy note. I tweaked the recipe a little, playing around with the flavours from the North eastern part of India. It's an addiction I cannot curb! The result was sublime. Need I say more?


Ingredients:
Chicken                  750 gm
Water                      1 litre
Onions                    3, large
Tomatoes                4, large
Raja Mircha            2
Green Chillies         3
Ginger                     1 inch
Garlic                      6
Coriander leaves      1 cup
Mint leaves               1 cup
Coriander powder     1 tsp
Garam Masala          1/2 tsp
Turmeric                   1/2 tsp
Bamboo Shoots         1/2 cup

Method: 
Grind the onions to a paste. Puree the tomatoes. Grind the mint and coriander leaves coarsely. In a mortar and pestle, coarsely pound the ginger, garlic and green chillies. In a heavy bottomed pan, bring the water to a boil. Add all the ingredients, except the chicken and bamboo shoots. Add salt and bring to a boil once again. Add the chicken and bamboo shoots and cook on high flame for ten minutes. Reduce the flame to sim. Cover and cook till the chicken is done. Serve hot with steamed rice, and do invite me over to slurp some!

Notes: 
1) Raja Mircha (King Chilly/ Boxer Mirchi/ Naga Chilly) is rare to source and also too hot to handle for most palates. So feel free to substitute with any regular dry red chillies,
2) Bamboo Shoots are an acquired taste. Also, like Raja Mircha they are hard to find in the mainstream markets. You can easily substitute with fresh green beans or even potatoes for an equally tasty dish.


Friday, November 13, 2015

Hara Bhara Chicken

The weekend is here, finally! And after all the Diwali madness, it is time for some comfort food. Now don't get me wrong. As far as food goes, it is all comfort to me! But right now I feel like some warm brothy chicken with a no fuss attitude and tankards of taste. Light on the masala and heavy on flavour. The kind of soul chicken that you can dip a  couple of slice of bread in (if you are me), or drown your rice in (if you are hubby). The kind of Chicken, that on a nippy November evening reminds you of a warm fireplace and home. Oh, and the kind of chicken that does not require me spending hours chopping, frying, cleaning!
Now this chicken doesn't look the lurid green required of a hara bhara, but there are some greens in there I promise!


Ingredients:
Chicken                      1 kg
Coriander                    1 bunch
Green Chillies             7
Cloves                         4
Black Cardamom        3
Ginger                         1 inch
Garlic                          5 cloves
Mustard oil                 4 tablespoons 
Curds                          2 cups
Kasuri Methi              1/4 cup
Water                          350 ml

Method: Grind together the coriander, cloves, ginger, garlic, cardamom and chillies. Heat oil in a deep pan and add the ground masala. Once the masala browns, and the fat separates, add the curds. Cook for five minutes. Add the chicken and salt. Stir till all the pieces are well coated. Add the water. Reduce the flame to sim. Cover and cook till done. Stir in the kasuri methi. And you are done! Simple, isn't it?