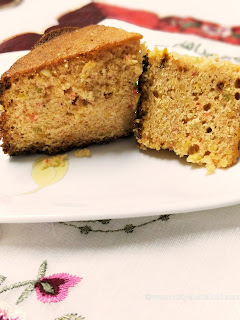
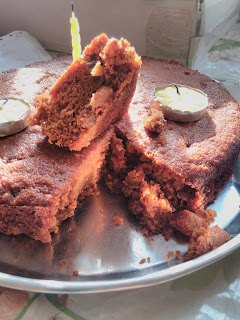
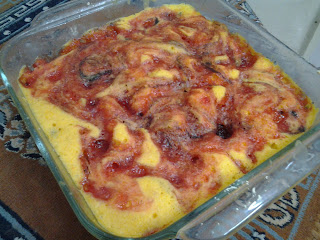
Showing posts with label dessert. Show all posts

Thursday, January 21, 2021

Upside Down Caramelized Orange Cake

 People romance Chocolate, but I need a zing! A citrus zing, to be precise. If you ever wondered why restaurants feature lemon or orange desserts on their menu... Well, for people like me! Lemon in the summer and oranges in winter!! Aaah! There is something simply divine in that!

My love for oranges is evident in my previous posts. I've made a marmalade , a cake and even a Kheer! Each one delicious in it's own way. I even made a very potent Orange Wine, but more on that later. This morning as the heady aroma of oranges greeted me from the fruit bowl, my heart craved cake. Now, I could go back to any of the previous cake recipes, but where's the fun in that?! 

I wanted to try something new. Something that had not just that citrus hit, but also celebrated the gorgeousness of the fruit. The fact that I've been dying to try a caramelized upside down cake, may or may not have influenced my decision. I used the French Yogurt Cake as my starting point. The flavours in that are just so fresh and citrusy! But i wanted the cake more crumbier and dense, to hold against the orange slices. So a few changes and to my luck, I got an absolutely perfect Upside Down Caramelized Orange Cake. 

Ingredients:
Flour                        1 and 1/2 cups
Semolina                  1/2 cup
Baking Powder        2 tsp      
Baking Soda            1 tsp
Oil                            3/4 cup
Sugar                       1 cup   
Eggs                        2  
Yogurt                     1/4 cup
Oranges                   4 
Brown Sugar          7 Tablespoons

Method:
Pre-heat the oven to 180 C. Sift all the dry ingredients together. Brush a 9 inch springform pan with butter. Sprinkle the brown sugar all over the buttered base. Thinly slice 2 oranges and arrange them over the sugar. Zest the other 2 oranges and rub into the granulated sugar. Once the zest releases it's aroma, beat in the eggs. Once the batter looks thick and creamy, beat in the yogurt. Now add the oil, drizzling a little at a time and beating well with each addition. Gently fold in the dry ingredients. 
Extract 1/4 cup juice from the zested oranges and add it to the batter. Pour the batter over the prepared tin. Bake for 45 minutes. Let it cool before serving it up! 

Notes: You can substitute the Oranges with Kinnows or Mandarins or any other citrus fruits.
 

Saturday, September 29, 2018

Cucumber cake with Gin icing

I Love September! It marks the baking calendar for me. And till March I'll be indulging in one luscious birthday bake after another! Mum's birthday falls in September, and I love adding an element of booze in her cakes. A rather generous element if I may add 😜 
In past years, there has been a very potent Chocolate Rum Cake, and a milder Beer Chocolate Cake. This year was a departure. I had been eyeing Kate Hackworthy's rather intriguing Cucumber and lemon Cake. It looked so pretty and refreshing. And of course, it came with a tempting Gin frosting. That cinched it for me! We had a bottle of Bombay Sapphire just begging to be used. It would be the perfect complement. My folks were less convinced! 
But I was going to convert them for sure. This recipe was popular and there had to be a reason.It was fairly easy to make. So that was definitely reason number one! It looked delicate and pretty. So reason number two. The frosting! Oh soooo good!! That was reason three, four and five! Then, the first bite! A refreshing summer party in my mouth! Reasons? Do we need anymore?! 
To those who are curious whether the cucumber taste carries through, I would say... Yes. It does. But not in a weird way. With the gin frosting and that light lemon aftertaste, the cucumber still remains the star. But the marriage of flavors is just fantastic. And may I add, addictive! Very addictive! I kept slicing thin corners to ward off temptation. Then, kept going back for more. The non believers were all converts. I can definitely see myself making this cake again and again. Coz it tastes brilliant even minus the frosting. So, if you need a wow factor for your next do, this is just the thing to try!

 
nutty about food 


Ingredients:

Cucumber                   200 gm
Lemon                         1, zest and juice
Butter                          150 gm
Granulated sugar         150 gm 
Vanilla essence            2 teaspoons
Flour                            200 gm
Eggs                             2
Baking powder            2 teaspoons

Icing:   Gin                  4 tablespoons
             Icing sugar      200 gm
            Butter               75 gm

Method:
Preheat the oven to 180 C. Wash the cucumber. Leave the skin on and slice vertically. Scrape out the seeds and puree. Add the lemon juice. Beat the butter, sugar, zest and vanilla till light and fluffy. Add the eggs one at a time, beating really well after each addition. Sift the baking powder and flour together. Now, alternating between the dry ingredients and the cucumber puree, add a little at a time to the batter. Mix well after each addition. So basically, add some flour, then mix. Add some cucumber, then mix. Continue till all combined. Pour into a greased tin and bake for 40 minutes. When done, allow the cake to cool completely. For the icing, just beat all the ingredients till smooth and fluffy. Refrigerate till the cake is ready to be frosted. Slice the cooled cake horizontally. Sandwich the layers with the icing. Swirl the rest of the icing on the top. And your Cucumber cake is ready!


Sunday, April 8, 2018

Beer Chocolate Cake

I've been experimenting with beer in my cooking and baking for a while now. I don't drink much of it coz it leaves me sleepy and bloated, but I do love the mild bitterness and depth it adds to food. Before I started the marathon experiments, I had only a layman's knowledge of beer. Pop a can or pull a draught at the microbrewery and really all beer was the same! Right? Wrong!! 
I actually got talking to a brewmaster and was boggled at all the subtleties and methods that differentiate each brew. Roasting, hopping, brewing, maturing... they all combine in limitless combos to bring the perfect aaahhh to your sip! 
When I baked my Beer Bread, I was completely clueless and just reached into the fridge for a Bud. But this time round I was better educated, and now that I understood the flavour profiles, i was confident of pairing the right beer with the right ingredients. 
This particular cake uses the English Brown Ale. The dark colour boosts the chocolate tones. And the roasted nutty malts carry an undertone of chocolate that just enhances the taste of the cake to an altogether different level. 
The best part about adding beer to your bakes is the texture. This cake in particular has a gorgeous moist crumb that makes you just reach for slice after slice. If you think I exaggerate, just bake a batch and try for yourself! 
Now I wish this was an original recipe, however, my inspiration comes from The Beeroness. I tweaked a few ingredients around. Added some and subtracted a little. After all, what's life without a little twist?!


Ingredients:
Eggs                         1
Butter                       1/2 cup
Granulated sugar     1 cup
Muscovado sugar    1/2 cup
Vanilla essence        1/2 teaspoon
Ginger powder        1 teaspoon
Beer                         3/4 cup
Oil                           1/4 cup
Flour                       1 1/2 cups
Cocoa Powder        3/4 cup
Baking soda           1/2 teaspoon
Salt                         1/2 teaspoon

Method:
Pre heat the oven to 180 C. Sift all the dry ingredients together. Beat the butter and the two sugars till pale and fluffy. Add the egg and the essence. And beat well. Gently stir in the beer and oil till combined. Do not beat or the beer will get too flat. Now fold in the dry ingredients a little at a time. Gently mixing till all is just combined. Pour into a well greased cake dish. Bake for 60 minutes. Let cool a little before cutting in!

Tuesday, October 24, 2017

The Leftovers Cake

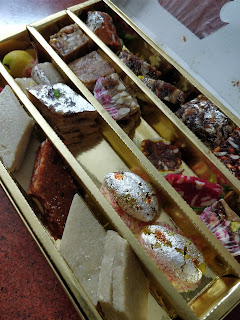
The Diwali frenzy has died down. The diyas have been washed and stored away. The fairy lights have been brought down and carefully returned to their boxes. The din of the crackers had quietened. The belts have loosened a notch. And the fridge is groaning under the weight of the mountain of mithais!
While we wait an entire year to indulge in these special Diwali sweets, the week long exchange makes us groan at the sight of yet another laddoo or barfi
Short of giving it away or crumbling it into yet another kheer or dessert, there aren't too many options around. But this year I decided to be inventive!


While the overdose of mithais had everyone gagging sweet, the realm of cakes had been untouched. If I could reinvent the barfis into a less sweet, unconventional tea cake, I was sure it would  find many takers. 
My inspiration came from the delicious Mawa Cake. This east meets west fusion was perfect for the cake I had in mind. After all, most mithais had a generous base of mawa to complement the dry fruits tucked within. Armed with a random mix of Kaju katlis, anjeer barfi, pista rolls and lavang latikas I set out to bring my experiment to life.
The result you ask? This gorgeous golden hued, light as air cake. The crust was crisp and inside was all soft sweetness. Redolent with the fragrance of mawa and dry fruits, this cake was an instant hit with the young and old alike. People came back for seconds. And thirds! Dipped into tea. Warmed for a quick snack. Topped with shrikhand for a rich dessert. This was definitely the most versatile product of my Diwali Leftovers! 
My fridge is emptied of all the excess mithai that lay unwanted. And I have a house filled with cake satiated tummies! Now if only someone can find a way to recycle all that Son Papdi!


nutsaboutfood

Ingredients:
Leftover Mithai                200 gm
Maida                               200 gm
Butter                               200 gm
Powdered Sugar               150 gm
Cardamom powder          1/4 teaspoon
Baking Powder                1 teaspoon
Eggs                                 4

Method:
Pre heat the oven to 180 C. Beat the butter and sugar well, till it is light and fluffy. Mix in the crumbled mithai. And beat well, till the batter is smooth. Sieve the maida, cardamom powder and baking powder and fold into the batter. Beat the eggs and incorporate into the batter. Mix everything well to get a smooth, consistent batter.
Alternately, if effort is not your thing, just whizz everything together in a food processor or mixie. Pour into a greased baking tin and bake for 45 minutes till a skewer inserted comes clean. Cool and slice!

Saturday, August 19, 2017

Gulab Jamun Cake

Traditional Indian Mithai and Cake? Doesn't sound quite right does it?! To most it seems incredulous that one carry marry the flavours of the Indian dessert palate with that of the European ones. But having successfully attempted the hugely popular Mawa Cake, I knew not only was it possible, but it was absolutely divine! A warm homecoming with the heady aroma of baking. 
Now those who have read my very first post, know that baking for my grandfather can be quite a challenge. But I hadn't been around for his birthday in a long time, and I really wanted to bake him something special. 
My news feed of late had been flooded with stories of Rasmalai Cake. While I personally don't enjoy rasmalai, it did give me an idea. I knew I had to make a cake that had its roots in the familiar. It really was a no brainer then. No dessert is ever as popular as the Gulab Jamun, and I knew I had to attempt yet another G-jam makeover.


I started my research and realized there had been a few attempts at recreating the magic, but nothing I looked at really hit the note. I read on and picked the brain of another Baking Diva I know. Also, Monster Munchkin would want to be part of the process, so I needed something simple yet drool worthy! This recipe seemed about right. But it needed a little more to make it truly festive and celebratory. I played with a few suggestions that would complement and not overpower the actual cake. And most importantly not push it to the realm of the too-sweet-for-seconds shelf. 
To be honest, I had my reservations even when I put the finishing touches. What if it was a total disaster? It seemed perfect on paper. The cake was light and baked to perfection. The frosting was not just a mouthful of oversweet fluff, and very consciously incorporated the only mithai my munchkin deigns to eat.  But what if my instincts were a little off! Heart in mouth, I carted it to my grandparents' place. Sure, it looked good. But aah! The all important taste test was still waiting. 
The first forkful, and my grandfather declared it a success! And it had nothin to do with the fact that his granddaughter and great grandson had baked it. For once, even my worst critic (Me!), had to nod in agreement. This was one for the kitchen heirlooms. A dessert that was going to grace my table many more times in the future!


Ingredients:

Cake:
Gulab Jamun Mix             3/4 cup
Whole Wheat Flour          3/4 cup
Sugar                                 3/4 cup
Milk                                  1 cup, warm
Vinegar                             1 tablespoon
Baking Powder                 1/2 teaspoon
Baking Soda                     1/4 teaspoon
Oil                                     1/4 cup
Salt                                    a pinch
Green Cardamoms            6

Frosting:
Kalakand                          200 gm
Almonds                           8
Cream Cheese                  180 gm
Gulab Jamuns                   8 small

Method:
Preheat the oven to 180 C. Mix the vinegar in the milk and keep aside for 15 minutes. Powder the sugar with the cardamoms. Sift all the dry ingredients together and give it a twirl with a wire whisk or spoon. Make a well in the center and add the rest of the cake ingredients. Whisk it well by hand or electric whisk till well blended. Bake in a greased 8 inch round pan for 35 minutes. Let it cool completely.
Upturn the cake onto a plate and slice horizontally in the middle. Liberally soak the two halves with the syrup from the gulab jamuns. Keep aside for 10 minutes. Lightly beat the cream cheese with a fork till fluffy. Spread a thin layer over the soaked halves. On the lower half, arrange sliced gulab jamuns to cover the entire area. I sliced my gulab jamuns into three parts, but it depends on the size if the jamuns. Now place the top half of the cake over this layer. The two halves reconciled, it was time for the final touch. Run the Kalakand in the mixer till smooth and mix into the remaining cream cheese. Generously swirl over your cake, letting your inner artist run free. Slice the almonds into chunky flakes and drop all over the frosted cake. 
I refrigerated the cake overnight and then brought it to room temperature before serving. But if your will power is being tested, you can dig in right away!


Tuesday, January 10, 2017

Kheer Komola

The new year is upon us. A whole 365 days filled with opportunities. And given the blogosphere trend, this post should be about resolutions and hope. But I am perennially optimistic and I really don't do resolutions. If I did I would have long ago vacated my warm couch, and walked out battling the real world. Instead I choose happily to sink further into my warm spot, snuggle my dog and monster munchkin closer and go tap tap on my browser.
Its not that I don't like interacting with the physical world. It is jus that I am plain lazy! I remember when my friends raved about the benefits of retail therapy, all I could think was why anyone would abandon their pajamas and blanket to battle crowds and look at racks and racks of the same boring stuff!
Then online shopping came along and my brain went Aah! This makes more sense. So there I was indulging in some post festive, end of reason sales therapy when I chanced upon Santrawale. They sell, well, oranges! Not just any oranges though. Organic, sustainable, sourced from farm oranges. They had me at Organic! So tappity tap and I had two dozen juicy Nagpur oranges on their way. 
Now if you've browsed my previous orange post you will know that I was suddenly struck with the question again. What the heck do I do with all those oranges. The marmalade batch was still going strong so that option was out. Wine was option two. But that was really a long term project. 
The new year demanded a new approach. (There I've done my bit of following blog trends) I needed something different. Something unexpected. Out came the journals and cookbooks. 
Kheer Komola popped up twice. Milk and Oranges? Sounds like a recipe for disaster right? And yet there were people out there enticing me to give it a swing. It was too cold for a souffle, but a dessert was definitely on my mind. Did I dare to try? 
It wouldn't be my first attempt at Orange Kheer, to be honest. A long time ago I had ignored mum's words of wisdom and experimented for a dinner party I was hosting. The recipe had been tried and tested by Good Housekeeping so what could possibly go wrong? Plenty, as it turned out! Instead of the refreshing, creamy dessert I ended up with a bowlful of dense gloop with a bitter aftertaste. To their credit, my guests actually ate their dessert and assured me it wasn't that bad. That disaster still loomed large in my food memories. And I do have this annoying need to conquer all peaks. So I geared up for round two of Kheer Komola challenge.
This time I was better prepared. I turned to friend Google and read every variation I could find. I said a short prayer. Brushed aside mum's skepticism and dad's ribbing. Nothing ventured, nothing gained. Ignoring the monster munchkin's calls I concentrated completely on my kheer karma. And it paid off! I was finally rewarded with a creamy yet light dessert that brought with it the promise of a refreshing spring with its delicate citrus touch. (Yes I can poetically romance food.) This was Kheer Komola the way I had imagined it. And so you can put away your search results. Go on and benefit from my Experiments with Oranges! And be prepared for friends and folk to be wowed by your brave and unusual dessert masterstroke.


Ingredients:
Milk                              2 litres
Oranges                         7
Sugar                             10 tablespoon
Green Cardamoms         5 or 6
Saffron                           a few strands

Method:
Heat the milk in a heavy bottomed pan. Once it boils, reduce the flame to the lowest and let it simmer. Soak the saffron stands in a tablespoon of the warm milk and keep aside. In the meantime, separate the segments of the oranges. Carefully, split the segment and discard the thin outer membrane. The white membrane is what caused the bitterness in my previous attempt. Remove all seeds as well, taking care to preserve only the pulp and juices of the oranges. It is a monotonous and exacting task, but then that's what makes this kheer so special. It is actually a labour of love! Powder the cardamoms, and don't forget to stir the milk every once in a while, scraping the bottom to ensure it doesn't stick and burn. Once the milk has reduced to less than half the quantity, blushing with a creamy hue, stir in the sugar, cardamom powder and the saffron soaked in milk. Let it simmer for another five minutes and then turn off the heat. Let the milk cool to lukewarm and then gently stir in the orange pulp. Allow the milk to be infused with the citrusy goodness overnight or for atleast four hours, If you are in warmer climes, serve this chilled and topped with pistachios. If like me you are freezing and need a reminder of the spring to come, serve the kheer at room temperature. And if like my father you want everything piping hot, just zap a bowlful in the microwave for 30 seconds. Either way, you won't be disappointed. 


Saturday, October 29, 2016

Bread Gulab Jamuns

Gulab Jamuns could truly be the most pan-Indian dessert. Found in every corner of the country, big and small, the flavour rarely varies despite the regional twists. Rose, kewra, cardamom, saffron... the gulab jamun still tastes just like home. 
I have yet to meet a person who doesn't like gulab jamuns. Or G-Jams,  to borrow a term from my cousin. Even those who prefer savoury over sweet can rarely resist the call of the G-Jam! Really, what's not to like? Golden, fried dumplings soaked in cardamom scented sugar syrup. Exotically delicious, yet endearingly simple!
The commercially available G-Jams are usually made of khoya. And homemakers like mum choose the less complicated route of instant G-Jam packets that use milk powder for a smoother, lighter version that is a lot less complicated than the original. And then there is a third, more unorthodox version. The Bread Gulab Jamuns!
I was first introduced to the bread version during my college years. Homesick on diwali, one of our friends surprised my roomie and me with a huge box of gulab jamuns. Made by his fauji mess cook. As we popped the first one into our mouth, he dropped the B-word! These were made with regular white bread! Despite being a foodie and a cooking enthusiast, I would never have guessed had he not told us! As for the taste? Suffice to say I disappeared with the entire box, coz, " Joey doesn't share food!"
I've been looking for the perfect recipe ever since and after many years of trial and error, I've created one that would have made the old Cook baba proud!


Ingredients:
Bread                        12 slices (I used wholewheat)
Custard Powder        3 tablespoon
Baking Soda             1 teaspoon
Milk                          2 cups
Sugar                        1 1/2 cup
Water                        1 1/2 cup
Cardamoms              3
Oil                             to deep fry

Method: Trim the edges of the bread. Soak a slice of bread in milk and squeeze to remove the excess. Repeat with all the slices. Run the crumbled, wet bread with the custard powder and baking soda in the food processor. Gently pulsing twice to obtain a smooth yet firm paste. Heat the sugar, water and crushed cardamoms in a deep pan till the syrup reaches a sticky, one string consistency. Take off the heat. Meanwhile, gently form the bread paste into smooth balls. Take care not to press too hard while rolling them or the consistency will not be spongy. Heat oil and gently drop the bread jamuns few at a time. Cook over medium heat so that the outside doesn't brown before the inside cooks. Once they are evenly golden, drain on kitchen paper and transfer to the warm syrup. Repeat with all the G-Jams. You can eat them warm or chill them in the refrigerator to serve later. Either way, they are easy to make and are always a blockbuster hit!


Friday, September 16, 2016

Chocolate Rum Cake


Drunk texting? Sure! We've all done that at some point of time. But drunk blogging? Well, that's definitely a first for me! Blame it on my mum's birthday. Yes, you read that right! Its my mum's b'day and her b'day cake that's gotten me here. Not that I am complaining! I could probably go for a couple of slices more, though the blurred edges of the words warn me otherwise.
Let me start by saying that my mum's favorite present are those beautiful boxes of dainty liqueur chocolates. With very little time to shop, I am embarrassed to say I came up with naught. This would have been acceptable had I a heartwarming present on standby. But alas! I failed there as well. So I thought of the next best thing. Make her some liqueur chocolates. And as my brains unfroze they decided to take it a step further. Chocolate and liqueur in a cake. An all in one dessert! 
Now it would have been great had I stuck to the thought and used one of my regular recipes. But no when you go big, why not go grand?! That's when we went from dainty to drunk! In my quest for the best ever chocolate rum cake, Google kept pointing me towards the Caribbean inspired dark chocolate and rum cakes. And the more I read, the more I knew I just had to make the most chocolatey, most boozy ever rum cake. Decadent and degenerate. 
Enter the recipe on foodinmybeard. After having devoured hundreds of rum and choc recipes, I can honestly say that this was hands down the booziest and easiest cake around. I knew I wouldn't rest till I made it. And well, ate it! Now the cake came out of the oven looking all normal and innocuous.
 

And then it was subjected to this. Now the bottles on top are merely to add weight to the lid, and don't actually form part of the recipe. But below the lid is a sinful, booze addled rum butter sauce that with the extra weight squishing it down, permeates every crumb of an already very rummy cake. The result? Drunk Blogging!

Ingredients:
Dark Chocolate Compound     170 grams
Butter                                       1/2 cup
Dark Rum                                1 cup
Flour                                        1 cup
Eggs                                         4
Sugar                                       1/2 cup
Brown Sugar                            1/2 cup 
Baking Powder                        1/2 teaspoon
Baking Soda                            1 teaspoon
Cocoa Powder                        1/2 cup
Salt                                          1/2 teaspoon

Rum Butter Sauce
Butter                                      1/4 cup
Sugar                                       1/4 cup
Dark Rum                                1/4 cup + 1/2 cup

Method:
Microwave the butter, chocolate and rum for 30 seconds. Whisk. If it hasn't melted completely, microwave again for 30 seconds. Whisk till smooth. Add the sugars and whisk well. Now add the eggs one at a time, whisking well after each addition. Sift all the dry ingredients together. Add half the dry mix to the wet batter and mix well. Now add the rest and mix till combined. Preheat the oven to 180 C. Pour the batter into a greased and lined cake tin. Bake for 45 minutes or till done. Once the cake is done, take it out and poke holes all over with a toothpick or skewer. Gently pour over the entire butter sauce. Cover with a lid that touches the surface of the cake, and weigh down with additional bottles. Once the cake cools completely, flip onto a serving tray and for once, you can drink your rum and eat it too!
Rum Butter Sauce: Heat together the butter, sugar and 1/4 cup of rum. Bring to a boil and let it boil for a minute more. Take off the heat and whisk in the remaining 1/2 cup of rum. Pour warm over the cake. This is the lethal weapon that turns your cake from decadent to drunk! 

Saturday, April 16, 2016

Mocha Layer Pudding

Everybody loves dessert. And if you are me, you probably skip the main course to make room for dessert. But be warned! You can't serve me ice cream and call it dessert. Ice cream is ice cream. When I was younger, parties always meant light citrus souffles and decadent mousses. There were multi layered trifles and warm, gooey flans. Ice creams were for weekdays when mom was too busy to whip up dessert. 
Of late though, desserts have vanished from the dinner parties. Too complicated and tedious, say the ladies. Trust me, it doesn't have to be. I am no superhero domestic diva, but I do manage to serve up a duo of desserts at the dinners I host. This Mocha Layer Pudding is almost always a permanent on my menu. And it only takes me five minutes. Honest! 
Give yourself a treat today and go ahead and try this blockbuster hit. I promise you will never fear once you've tried this dessert dare!


Ingredients:
Bread                          10 slices
Cocoa Powder             6 tbsp
Coffee Powder            1/2 tbsp
Sugar                           6 tbsp, powdered
Fresh Cream               500 gms
Walnuts                       1/2 cup, chopped
Rum or Brandy          2 tbsp (optional)

Method:
Run the bread in the mixer to make bread crumbs. Whip the cream lightly and add 2 tablespoons of sugar and the brandy or rum. To the bread crumbs, add the rest of the ingredients and mix well. In a serving dish, spread a layer of the bread mix. Then pour a layer of the cream. Repeat layers till the ingredients are used up, ensuring the last layer is of the cream. Garnish with chocolate bits and shavings and some walnuts, Refrigerate for an hour. And you have yourself an easy dessert to indulge!


Saturday, March 5, 2016

Carrot and Raisin cake

The monster munchkin has turned two! There were days that never ended, and yet when I look back time seems to have just flown. Parenting hasn't gotten easier, just the challenges have changed. Just when I thought I had figured it out, the munchkin will throw a curveball my way. Mum rolls her eyes when I mention it. Her grandkid is an angel and I am the monster!
One thing that hasn't changed, is my obsession to provide him balanced, nutritional meals. And this includes sweet indulgences. Luckily he hasn't taken to chocolates and sugar laden treats like his dear ol' mum! Last birthday he was indulged with a blueberry yogurt cheesecake. And now it is the year of the super healthy Carrot and Raisin Cake. Now scoff all you like. I did too. But surprisingly, it was delicious. And the monster munchkin actually asked for seconds! Guilt free indulgence on his birthday? Hey! Why turn him down?!
So give this kid friendly recipe a go. Duly endorsed by an ecstatic two year old :)

Ingredients:
Carrots                                2, large
Soft Brown sugar               3/4 cup
Eggs                                   2
Butter                                 1/2 cup, melted
Whole Wheat Flour           1 1/4 cup
Baking Powder                  1 teaspoon
Baking Soda                      1/2 teaspoon
Milk                                   1/4 cup
Cinnamon powder             1/4 teaspoon
Clove powder                    1/4 teaspoon
Nutmeg powder                 1/4 teaspoon
Ginger powder                   1/4 teaspoon
Raisins                                1 cup

Method:
Pre-heat the oven to 180 C. Run the eggs and carrots in a food processor till the carrots are finely chopped. Add butter and sugar. Process again till well blended. Pour into a bowl and fold in the rest of the ingredients. Bake in 9x5 inch loaf tin for 45-50 mins. Serve up a slice of health and happiness.


Thursday, February 11, 2016

Cappuccino Walnut Cake

Valentine's Day is not really a biggie at our place. Blame it on hubby dear! He is quite the romantic, and my entire year is peppered with heartwarming gestures.. both small as well as extravagant. Love notes will find their way into the most extraordinary places and that outfit I casually termed nice, will suddenly show up in my closet! But by far the most romantic gesture took place two years ago.
I was preggers and craving desserts. However, we were living in this quaint hill station with a delicious but very basic bakery. Now, over the years, every time hubby asked me to choose a gift, I would promptly ask him to bake me a cake. It became a comic routine between us coz hubby dear's kitchen skills are limited to tea and instant noodles. But this time when we re-enacted the routine on my birthday, he steeled himself and out came a manly, " All right!"
I thought he was joking. But turned out he was quite serious. " I will bake you the fanciest cake you desire. But you will have to guide me through the sticky parts." It was the offer of  a lifetime and there was no way I was letting it go! So out came the recipe books. And the first recipe to pop open was the Cappuccino Walnut Cake!
Now that was a cake that required time, dedication, and above all skill. But the army man was not one to back down from a challenge! He could practically see me salivating over the page! So off he went with whiskey in hand and attacked it with the precision of a strategic battle. Of course, he needed the General's (moi) expert guidance once in a while. But he did it. And all by himself. The end result was the maid begging me to never let him enter the kitchen ever again! And the cake? Gosh! It was the best I had ever eaten. Utterly addictive and full of love! I had to eventually request him to hide it so I wouldn't devour it one sitting :p
So this Valentine's Day, ditch the conventional. And instead, pour your heart into making something your better half will forever cherish. It could be a self written poem, a handmade card, breakfast in bed, or this absolutely divine cake.

Ingredients:
Butter                           65 gm (4 tablespoon), melted and cooled
Maida                          100 gm (3/4 cup)
Baking powder           1 teaspoon
Eggs                            4 
Caster sugar                125 gm (1/2 cup)
Coffee powder            1 1/2 tablespoon, dissolved in a little milk
Walnuts                       3/4 cup, toasted, cooled and chopped

Decoration:
Walnuts                       1/2 cup
Sugar                           1 tablespoon
Cinnamon powder       1/4 teaspoon

Icing:
White Chocolate          200 gm (2 milky bars)
Coffee powder             4 teaspoon, dissolved in a little milk
Cream                           500 gm, lightly whipped

Method:
Preheat the oven to 190 C. Beat the eggs and sugar together in a food processor or with an electric mixer, over a pan of hot water. Beat till the mixture is fluffy. Remove the hot water and continue beating the eggs for another 10 seconds, till it is cooled and leaves a ribbon trail. Gently fold in the the rest of the ingredients. Pour into a greased tin and bake for 25 minutes. Cool. Split the cake into half horizontally. Spread half the icing onto the lower part of the cake. Place the top half. Spread the remaining icing on the top and sides. Coarsely grind the decoration ingredients together. Sprinkle onto the top and sides of the cake. 
For the icing: Chop the chocolate and microwave for 90 seconds, till melted. Beat the coffee and cream till smooth. Slowly beat in the melted chocolate. Icing is ready to be used.


Saturday, October 31, 2015

Besan Laddoos

It was the summer of '88. My uncle was home from his training academy and my grandmum had spent most of her waking hours in the kitchen. She lovingly doled out all his favourite dishes, and cooked enormous amounts of sweets and savouries for him to carry back. One of the many snacks in his care package was Besan Laddoo. These melt in the mouth balls of sweet, addictive goodness were the perfect pop for a quick dessert fix.
When the time finally came for his departure, and all the goodies were being packed, my granny realized something was amiss. The box of laddoos seemed much lighter than she expected. When she opened it, she was aghast! The box was completely empty! Not a crumb in sight. Uh-Oh! It was confession time! Over the past few days I had snuck into the kitchen at every possible opportunity, and popped a couple of them. And before I knew it, well, the seemingly endless supply ran out! In my defence, there were only 50!
Fast forward to the present. Hubby dear is as fond of these laddoos as I am. So I borrowed this recipe from granny. It is a healthier alternative to the traditional ghee dripping, syrup soaked ones. And as I watch the lil one sneak one into his mouth, I know we don't stand a chance! So I am gonna quickly type this out and go grab one while they are still around!


Ingredients:

Besan                    3/4 cup
Melted Ghee         1/2 cup + 1 teaspoon
Sugar                    1/2 cup
Semolina              1/4 cup
Green cardamom     5

Method:

Powder the sugar along with the cardamoms and keep aside. Heat 1 teaspoon of ghee in a wok and roast the semolina till golden, but not brown. Empty onto a plate. Now heat the rest of the ghee in th wok and add the besan. Cook on high flame till darkens and turns red. Take care it doesn't burn, so keep stirring continuously. Add it to the semolina on the plate. Spread this mixture and let it cool till it is luke warm. Now add the powdered sugar. Shape into balls, and pop one for instant gratification ;)


Saturday, October 17, 2015

Quick Mocha Cake


I love baking. I love all its finicky measuring and obsessive temperature control. But there are some days when I still want my cake fix, but minus the long drawn complicated process. Enter the Quick Mocha Cake. Not only is this a one bowl wonder, but it also cooks in double quick time. Really win win in my opinion. Now, the purists can scoff all they want, but the proof is definitely in the eating. And this one is addictively delicious!

Ingredients:
Whole Wheat Flour         1 and 1/2 cups
Cocoa Powder                  1/2 cup
Baking Powder                 1 teaspoon
Baking Soda                     1/2 teaspoon
Milk                                  1 cup
Vinegar                             1 tablespoon
Kahlua essence                 a few drops
Sugar                                 1 cup
Butter                                3/4 cup

Method:
Mix the vinegar and milk. Keep aside for 10 minutes. Sift all the dry ingredients together. Grease a 7 inch square baking dish. Finally, mix all the ingredients well. Pour into the prepared dish. Level it out. Microwave on full power for 7 minutes. Let it rest for a few minutes more. The Quick Mocha Cake is ready.
Slather it with ganache. Or serve up with a scoop of vanilla ice cream. Munch it with some coffee. Or jus eat it as is!

Note: The Kahlua essence can be substituted with a mix of 3 heaped teaspoon instant coffee powder and 1 teaspoon hot water.

Monday, September 7, 2015

Jam Swirl Blondies


Blondies are said to be the original brownies. Crumby with just a hint of chocolate. Over time, chocolate took over the entire dessert and came to reign as the crowd favourite. But aah! Blondies have a charm of their own.


 Ingredients:
                      Jam                            1/2 cup
                      Plain Flour                 3/4 cup
                      Custard Powder         3/4 cup
                      Baking Powder          1/2 teaspoon
                      Salt                             1/2 teaspoon
                      Butter                         1/2 cup
                      Sugar                          3/4 cup
                      Cream                         2 tablespoon
                      Eggs                            2
                      Vanilla essence           1 teaspoon
                      Chocolate chips          1/2 cup


Method:
             Microwave the jam for 1 minute. Stir and leave aside to cool.  Sift all the dry ingredients together. Thrice. Beat the sugar and butter together till thick and pale. Add the eggs, cream and essence and beat again till creamy. Fold in the chocolate chips. Now gently fold in the sieved ingredients, until just combined. DO NOT BEAT! Pour into greased 8 inch square dish. smooth the batter evenly. Drop the jam on top. Swirl gently with a fork or toothpick, taking care to not scrape the bottom. Microwave at full power for 7 minutes. Let it stand for 15 minutes before serving.Alternately you can bake in a preheated oven at 180C for 30 minutes. Serve up with some chilled coffee or a scoop of vanilla ice cream.


Wednesday, August 19, 2015

Sheera

Sheera is semolina based dessert that is also known as Sooji ka halwa in the northern parts of India, and is  a close cousin of the southern Kesari. This recipe originates from Maharashtra and differs from the others by its use of milk instead of water. 

Sheera is quite a filling and healthy dish so its often eaten for breakfast or as a weaning meal for babies. As for me, I can eat Sheera anytime, especially when I see the raindrops batter my window and fill the room with the scent of the earth.
This recipe is my granny’s who definitely makes the best Sheera in the world!


Ingredients:

Semolina     1 cup
Ghee           ½ cup
Milk            1 cup, warmed
Sugar           ¾ cup
Banana        1

Method:
Heat the ghee in a wok. Add the semolina and roast till golden. Stirring continuously, add the milk in a slow and steady stream. Cook for a minute and lower the flame. Add the sugar and mashed banana. Mix thoroughly and cover with a lid. Let it cook for another minute. Uncover, mix and cover again. Cook for another minute and switch off the gas. The grains should have separated and lost their stickiness. If not, cook covered on a low flame for another minute. And your sheera is ready to be devoured!
For additional flavour and nutrition, you could add green cardamom powder and garnish with chopped nuts.


Tuesday, August 4, 2015

Coffee Praline Mousse


This recipe has been gleaned from a very dear friend, Priyanjana. This easy breezy dessert is a family favourite at hers, and very quickly became one at mine as well. it looks gorgeous, tastes sinful and is simple enough for even the most kitchen phobe. So, what's not to like?!

Ingredients: 
Milk  1/2 ltr
Sugar  8 tablespoon
Custard powder  6 tablespoon
Coffee powder  4 1/2 teaspoon
Butter  25 gm
Cream  200 gm

Praline:  Sugar 1 1/2 cup
                Walnuts  1/2 cup

Method: 

For the Praline: Heat the sugar in a saucepan over low heat, till the sugar melts and turns golden brown. Turn off the heat. Add the walnuts and spread on a greased tray. Once cool and hardened, place between two sheets of butter paper or in a polybag and crush to shards with a rolling pin.

For the Mousse:
Mix the custard powder with a little milk in a cup. Add it to to the rest of the milk and place on low flame. Mix in the coffee powder and sugar and continue to cook on low flame. Stir frequently to prevent lumps and from the mixture sticking to the bottom. Once it thickens considerably, enough to coat the back of your spoon, take it off the heat. Mix in the butter and leave awhile. Once the mixture cools, run it in the mixie or food processor for about a minute. tip in the cream and churn a couple of times more. Take care to not churn the cream for too long or the mixture will curdle. Transfer to a serving dish. Cover and chill in the refrigerator for a few hours, preferably overnight. Top with the shards of praline just before serving. Take a deep breath and sit back to enjoy the dessert and the compliments :)

Handy Hint: If you don't have patience for praline, simply substitute with crushed chikki !


Thursday, July 4, 2013

French Yogurt Cake


Anything French conjures visions of complicated techniques with impossible ingredients and hellish temperaments. But the French Yogurt Cake is simplicity itself. A few basic ingredients, couple of easy to do steps and even the novice can pull out a masterpiece from the oven! I got this recipe from DawnF on TTOD and successfully tried a number of variations. This delicate orange flavoured version has been my favorite so far.

Ing: 1 1/2 cups of plain flour
      2 tsps baking powder
      1 cup granulated sugar
      1/2 cup sunflower oil (or any other flavourless oil)
      1/2 cup regular yogurt (you could use non fat if you desire)
      3 eggs
      1 tsp vanilla essence
      a pinch of salt
      grated zest of two oranges (avoid the white pith)

Method: Put the sugar and zest in a bowl and rub with your fingers till the sugar is moist and the zest releases its aromatic oil. Whisk in the yogurt, eggs and vanilla till well blended. Sift the dry ingredients together and mix into the batter. Now carefully fold in the oil, a little at a time, till the whole batter becomes a light, homogeneous mixture.
Grease a baking tin and pour the batter into it. Pre- heat the oven to 180 C and bake the batter for 60 minutes. Unmould after cooling and drizzle over some melted chocolate. 


Friday, August 31, 2012

Roasted Banana Cake

Bananas are not really on top of everyone's favorite fruit list, but they are an excellent source of potassium and energy. Inundated with a surplus of bananas recently, i turned to my irresistible creation: the Roasted Banana Cake. It is a recipe developed over years of experimentation, and its temptingly perfect :) 

You will need:
Ing:

3/4 cup butter
3/4 cup sugar
2 eggs
1 and 3/4 cup flour
1/4 cup fine semolina
1 tsp baking pd
1 tsp baking soda
pinch salt
1tsp vanilla extract
4 bananas
1/2 tsp cinnamon pd
1/2 tsp clove pd
1/2 cup brown sugar
5 tsp dark rum
1/2 cup hot water

Method: Slice bananas thickly and place on a square sheet of aluminium. sprinkle with the brown sugar, vanilla, rum and spices. wrap into a loose package and bake at 180 C for 15 minutes.

cool and mash roughly. beat together the butter, eggs and sugar till light and fluffy. Add the banana mix. sift the baking pd , flour and salt and fold into the batter alongwith the semolina. mix the baking soda with the hot water and add last to the batter. pour into a greased 6 egg cake tin and bake in a pre-heated oven at 180 C for 35-40 minutes.