Showing posts with label healthy. Show all posts

Thursday, May 10, 2018

Stuffed Karela

Karela or the bitter gourd is not a veggie that turns up often on search engines. I haven't found too many people enthused by the idea of having karela for lunch. And the few who do, have it mainly for the health benefits it has to offer. Not for love of the vegetable. 
I genuinely do love karela. This puzzles as well as aggravates Mum. She absolutely abhors Karela. But love for her only child forces her to dish it up week after week! But there is only one way she deigns to consume it. Stuffed and deep fried. Health benefits be damned!
My grandmum makes this amazing bitter gourd curry with coconut and garlic. But nothing will induce mum to eat that. This recipe was handed to her by one of their neighbours. So for years these were referred to as Chandel Aunty Karelas!
These aren't as bitter as the other recipes. And the tangy, spicy filling is really quite addictive. Throw in a handful of french fries on top, and even kids will have a go!


nuttyaboutfood

Ingredients:
Bitter Gourd                 6
Onions                          2
Ginger garlic paste        2 teaspoon
Garam Masala              1/2 teaspoon
Pepper powder              1/2 teaspoon
Dry Mango powder      1 teaspoon
Coriander powder         1 teaspoon
Salt                                to taste
Turmeric powder          1/2 teaspoon
Chickpea flour              2 tablespoons

Method:
Scrape the ridges of the karela. Slit it vertically and discard the seeds. Rub a little salt and turmeric inside and out. Leave in the sun for an hour. In the meantime, prepare the masala. Grate the onions, add salt and leave for 20 minutes. Squeeze the onions well to drain out all the water. In the drained onions, add all the rest of the ingredients, except the chickpea flour. Wash the karelas well and pat dry them with a kitchen towel. Fill the prepared masala into the cavity of the gourd. Now prepare a thick paste with the chickpea flour (besan), a little salt and water. Use this paste to seal the edges of the stuffed karelas. Heat oil in a wok and lower the karelas sealed side down. Cook on medium heat. You can choose to deep fry these. Or shallow fry them covered , turning them frequently to ensure they are well browned on all sides. Enjoy with some rice and plain yellow dal!


Tuesday, August 1, 2017

Almond Cheese Spread

We shook off the snow and tumbled into the house. We were cold and hungry. And you know what's my comfort food on a cold, snowy day? Hot, buttered toast! Nothing can make me feel as good. So aunty put the griddle on and liberally coated it with butter, placing two slices of bread to crispen to that beautiful gold. 
When she flipped it over to the other side, I thought we were almost done. But, nope! She had an ace up her sleeve. She dolloped on some cheese spread and let it just melt into the crisping toast. Dotted with ketchup. And then judging my impatience correctly, let me wolf it down straight from the pan.
I waited for the salty, slightly plastic cheesiness of store bought spread to hit my tastebuds. But instead was surprised by subtle flavours so generously complimenting the creamy goodness that could only come with homemade love!
It was so good, I wolfed down six toasts before my foodie brain could form the words, " May I have the recipe, please?"
That was 12 years ago, and I still slather this spread with the same reverent wonder. For me it has the same joy as my grandma's home made white butter. Another dairy addition to my toast I can't get enough of!
Another good thing about this cheese spread is that it sneakily incorporates the wholesome nutrients that  growing tots may screechingly run from. But ever know a kid to turn down cheese and toast? Nope! So say hello to our hidden superfood friends- Almonds and Garlic. Even Keto Hubby gave the spread a big thumbs up! It was just the thing he needed to jazz his Keto Bread :)
So I'll go steal a spoonful from the jar, while you go whip up your own batch of yummy health.


Ingredients:
Cheese           200 gm (grated)
Cream            1/2 cup
Milk               1 cup
Almonds        20
Vinegar          1 tsp
Sugar             1 tsp
Red Chillies   5
Garlic             5
Pepper           1/4 tsp

Method:
Soak the almonds and red chillies for half an hour. De-seed the red chillies. Remove the skin from the almonds and discard the water. Run the almonds, chillies and garlic in the mixie to make a coarse paste. Add the rest of the ingredients and blend till smooth. Refrigerate and use within a week.

Notes:
I used fresh cream (malai) skimmed off the top of our milk. You can use packaged cream as well. 
Since the chillies are soaked and de-seeded, they are not spicy and are mild enough for kids. You can however reduce the chillies if you like.
For the Keto version replace the sugar with Stevia. 

Saturday, July 22, 2017

Moist Honey Cake

Two rough looking mountain men stood outside my door. Wild eyes, chiseled features, long unkempt hair and sinister moustaches. "Bhaia ne bheja hai", they said. As I pondered which cousin had decided to prank me, Hubby turned up behind them. " They are with me." All further questions were preempted by the younger of the two. " Bhabhiji, patila. Fresh Honey hai hamare paas." 
Confession time. My hubby is pretty gullible when it comes to helping people in need. I have never known him to say no. Ever! So as I pondered what racket these guys were running, they produced a hive from their sack. Soon, oozing into my bowls was the fragrance of roses and spring! At least this was a sweet smelling racket. Three litres lighter and a few hundred rupees richer, the men departed happy.
Before I could launch my tirade, Hubby appealed to my health freak side. Uh uh! I was not falling for that. Honey may have health benefits, but there was no way i was consuming unprocessed honey! A few neighbours assured me this honey was marvellous. They had purchased from the Mountain Men in years past and never been disappointed. But I just wouldn't budge. So there stood the bottles in the pantry, forlorn and dusty. A month later, I opened them to check if they had gone stale. Once again, the promise of roses and sunshine enticed me. The monsoons were in full swing and the rains had me longing for spring. If I closed my eyes and inhaled the honey, I could just feel the fresh warmth around me. I had to figure out a way to incorporate this!
There was still no way I was going to consume it raw, so a cake was the safest route to take. Google to the rescue and I chanced upon Marcy Goldman's recipe. It had the right texture I needed and the ingredient list was perfect to warm up these windy weeks of grey rain! I scaled and adapted it from here. And my house was enveloped with the warm smells of heavenly baking!
This cake is not over sweet or sticky as most honey cakes are. It is light, almost delicate with an intense flavour that just gets better with time. No stale cake quandries with this one. Infact this cake was so good, I had to bake another batch the very next day!
So elevate your monsoon cuppa with your very own version of sunshine. And bake some goodness today. Don't worry about indulgence! Honey is healthy, remember ;)


Ingredients: 

Maida                    1 and 3/4  cups
Baking Powder      1/2  teaspoon
Baking Soda          1/2  teaspoon
Salt                         1/4 teaspoon
Cinnamon               2 inches
Cloves                    10
Ginger Powder       1 teaspoon
Nutmeg                  1/4 teaspoon
Peppercorns           4
Oil                           1/2 cup
Honey                     1/2 cup
Granulated Sugar    3/4 cup
Brown Sugar           1/4 cup
Eggs                        3 (small)
Vanilla Essence       1/2 teaspoon
Warm tea                1/2 cup (I used Early Grey)
Orange Juice           1/4 cup (fresh)
Orange Zest            1/2 orange
Whiskey                 60 ml

Method:
Pre heat the oven to 180 C. Grind together the cinnamon, cloves, nutmeg, peppercorns and ginger powder. In a large bowl whisk together the flour, baking powder, salt, baking soda and the spice powder. Make a well in the middle and pour in all the rest of the ingredients. Use a wire whisk to mix it all together. If you want to use an electric mixer, use it on slow speed. Too much air into the batter will spoil the texture of the cake. Scrape the bottom and the sides to ensure the batter is mixed thoroughly. Pour into a greased and lined 9 inch bundt cake pan. Bake for 60 minutes. The cake should spring back when you gently touch the center. Let it rest in the oven for 15 minutes before you demould and attack!!!

Notes:
I used early grey tea to intensify the citrus notes. You can use your regular brewed tea. Jus remember no milk or sugar.
You can also substitute the tea for strong brewed coffee.
You can bake the cake in three loaf pans, two 9-inch square or round cake pans, one 9 or 10 inch tube or bundt cake pan, or one 9 by 13 inch sheet cake. However I found baking in a ring or tube pan gave better results.
If you have large eggs, use 2 1/2 or just 2. 
The whiskey can be substituted with rum or fresh orange juice.


Wednesday, April 19, 2017

Ripe Mango Raita

Summers are here with their blistering cruelty and endless lethargic days. Yawning in the heat, food is really the last thing on anyone's mind. Unless it is a long sip of icy coldness. Sharbats, curds and salads rule the day. And of course, the king of fruits, the sweet sweet mango! Summers are practically synonymous with mangoes. The popularity of this royal fruit transcends all boundaries, and paens have been written in its praise! 
I remember summers in my uncle's orchards where the ripe mangoes had been tossed into the well to cool. Anytime we needed a mango fix all we had to do was lower the bucket and draw up some juicy goodness. Most households in India had a designated bucket in the corner of their kitchen. Filled with cool water and luscious golden mangoes. A friend of mine narrated an interesting custom at grandparents' place in Himachal. Once the mango season started, the kids would go visit, but would only be allowed once they had finished their allotted mini buckets of mango! 
Each household has mango based recipes they guard with the preciousness of jewels. Pickles, salads, jams, chutneys... all find a place in their repertoire. Now the best part of army life is that not only do we traverse diverse regions, but also form close bonds that last a lifetime. Over the years mum has amassed a treasure trove of traditional recipes via her fauji family.
One of mum's closest friends is Bhavani Aunty. She is one of the sweetest, most wonderful human being we've had the joy of calling our own. Not only is aunty a fabulous cook, but also an immensely creative one. She has the talent of spinning the most mundane into something exotic and drool worthy! And when mum tasted the Ripe Mango Raita at her place, she knew it was a recipe she would recreate time and again.
The traditional raita is made either with salad veggies like tomatoes and cucumber or with crispy fried gram flour boondi. But aunty's mango version was unusual and delicious! And really, what could be more summery than chilled curds swirled with chunks of sensational mangoes!
  

NUTTYABOUTFOOD

Ingredients:
Curds                      500 ml
Water                      150 ml
Mangoes                 2, medium
Onion                      1, small
Green chillies          3

tempering: Mustard seeds       1 teaspoon
                   Curry leaves          3 sprigs
                  Red chilli powder   1/2 teaspoon
                  Oil                           1 teaspoon

Method:
Whisk together the curds and water till smooth. Add salt to taste. Finely chop the onion and green chillies. Mix into the whisked curds. Cube the mangoes and gently toss into the mix. Prepare the tempering by heating the oil and letting the mustard seeds splutter. Throw in the curry leaves and let them crisp. Turn off the gas and add the red chilli powder, Swirl the tempering over the prepared raita and chill in the refrigerator for a while. Serve as a side with pulao or biryani. And to be honest, it tastes fabulous on its own!

Tuesday, April 4, 2017

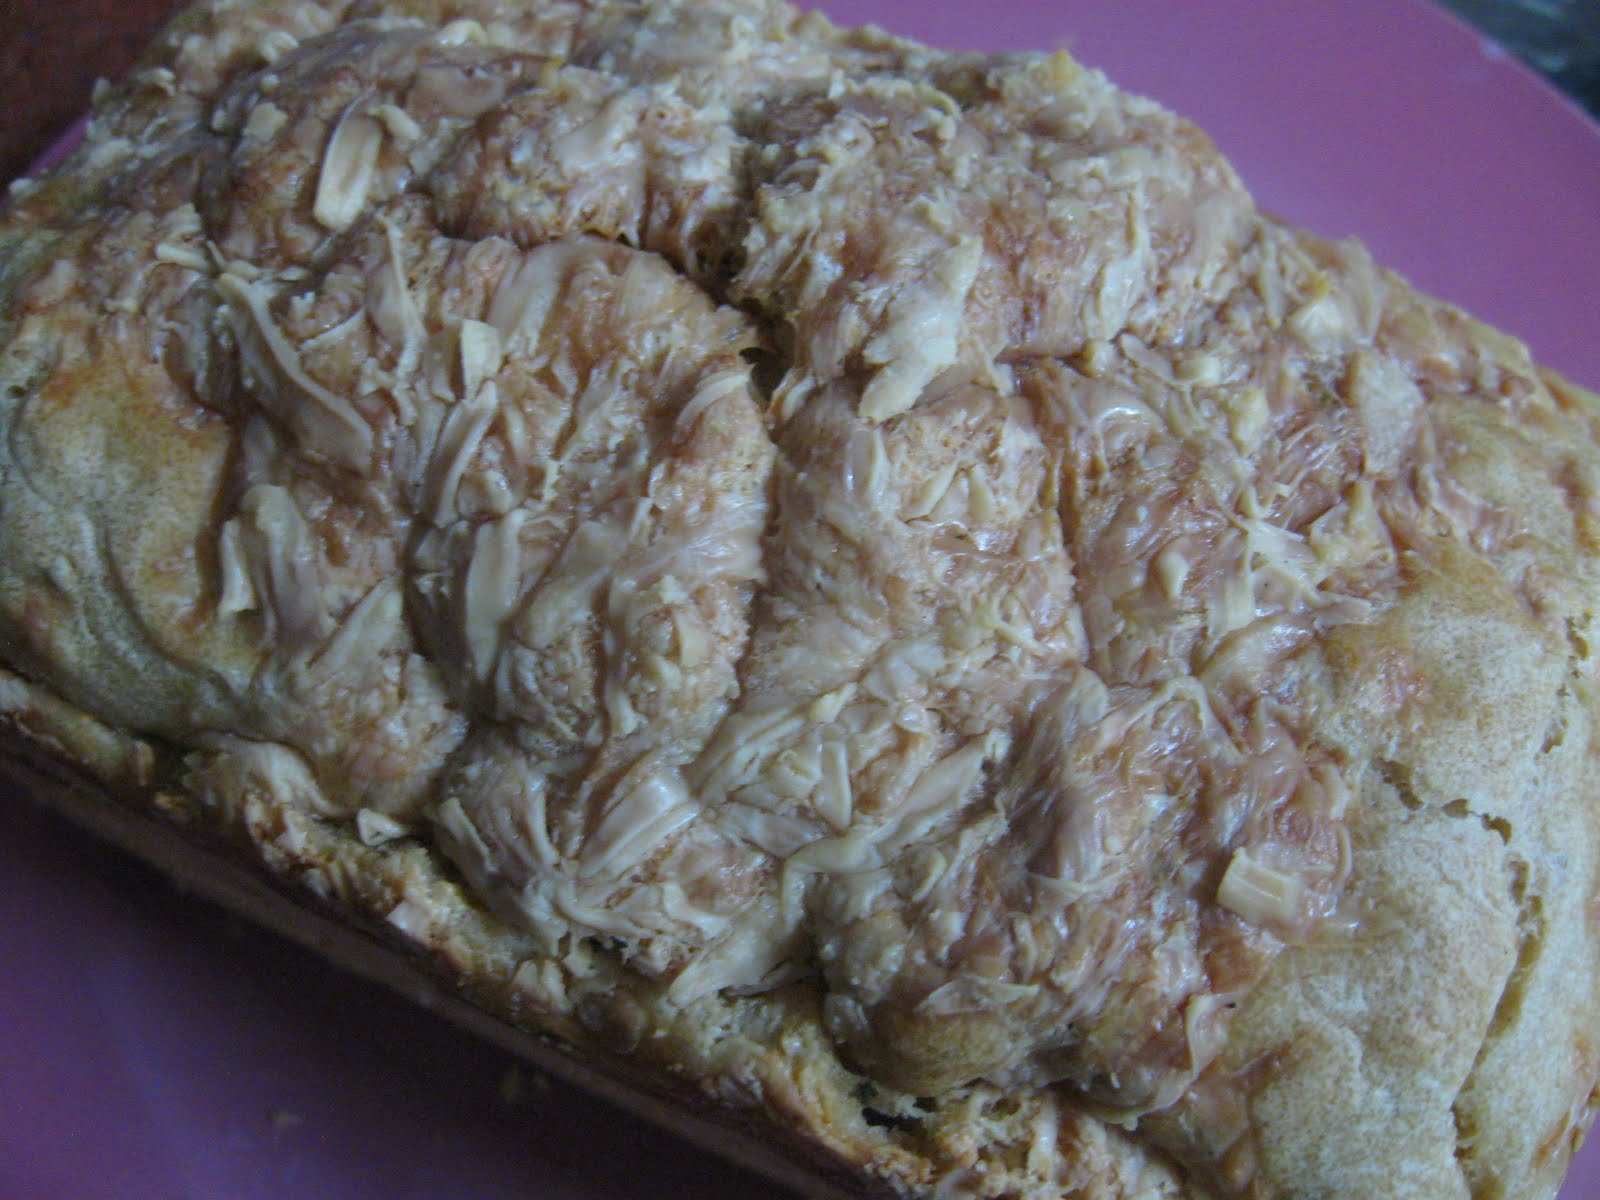
Keto Bread

A low carb, gluten free bread? It never did sound appetizing to me. But then Hubby darling went Keto, and our entire carb approach was tossed into the can. Adapting existing recipes to fit Keto was not as tricky as most fear. Infact as Keto became norm, exciting new twists were born of old classics. 
And though he loved his rice and parathas, hubby didn't quite miss them as much as he had expected. It really was a win win for him.
There was one thing he did miss. While never a fan of regular sliced bread, he had started to crave toast. Who wouldn't when your breakfast is bacon and eggs sunny side up. After all, you need something to mop up all that gooey goodness! Thus was born the need to experiment with a keto friendly bread.
Now the most popular keto breads are almond flour based. Though delicious, almonds aren't quite budget friendly. Every keto forum had people moaning about increased dents in the pocket. So I figured let's do a keto bread that won't break the bank.
I scoured the net for dozens of recipes and finally found my inspiration here. I tweaked it a little so i wouldn't have to make a store run. A few easy steps and surprisingly I got gorgeous golden bread!

nuttyaboutfood.com

Ingredients:
Eggs                                             6
Dessicated Coconut Powder        3/4 cup
Flax Seed (Powdered)                   3/4 cup
Salt                                               1 tsp
Baking Powder                             1 tsp
Psyllium Husk                              4 tablespoons
Baking Soda                                  1/2 tsp
Warm Water                                   1/2 cup
Apple Cider Vinegar                      1 tablespoon
Oregano (optional)                         1 tsp

Method:
Whisk together all the dry ingredients, except oregano. Add the wet ingredients and mix well. Put it in the fridge while you preheat the oven to 180 C. Grease a rectangular baking pan. I used a 13x6. Bring out the batter. Give it a good mix and pour into the dish. Top with crushed oregano. Bake for 40 minutes on a low rack. Cool and slice into 14 squares. It stays happily refrigerated for upto two weeks. Bring out a slice or two. Grill them, toast them, pan fry  them or simply slather cold with some cream cheese and fix that bread craving!

nuttyaboutfood.com

Tuesday, November 22, 2016

A Spoonful of Immunity: Turmeric Amla Pickle


" Aah! You can feel the healing goodness travel through your entire being," exclaimed Mads Masi with every bite. That definitely had my attention. I backtracked to the table to get better acquainted with this health bomb I had missed. Never would I have guessed that the bowl of blinding sunshine I had dismissed as just another chutney was the reason for the health hallelujah! 
Turmeric and Amla Pickle. Yet another ingenious method Nani had devised to sneak immunity into our daily food. And its no grandma's tale, really. Science has backed the benefits of the Indian gooseberry for years. And turmeric of course, is already hailed as the super-food of 2016.

Turmeric has proven anti-inflammatory properties. It has been known to reduce the risk of cancer, normalize insulin levels, banish aches and arthritic pain, promote healthy digestion and boost brain function. Now, I could list all the proven benefits in detail, or you could just read them here and here.
As for Amla , the humble and much ignored Indian Gooseberry is loaded with Vitamin C making it ideal to stave off those pesky coughs and colds. The high iron content is great for combating anemia and getting that gorgeous glow. It is also a known agent for stabilizing blood sugar, promoting heart health and also the high fiber content means bye bye constipation.
On their own turmeric and amla are a little strong to munch. But toss them together in this super healthy and you will have the entire family lining up to get their daily dose. Bursting with freshness and flavour, who would have thought great health came in such chatpata form!
And yes, Mads Masi was right! You can truly feel the healing goodness travel through your entire being!

Ingredients:
Raw Turmeric Root        250 gm
Amla                              250 gm
Lemons                          3
Kala Namak                  to taste
Sugar                             3 teaspoon
Oil                                 2 tablespoon
Asafoetida                     a pinch
Red chilli powder          1/4 teaspoon

Method:
Grate the turmeric and amla as finely or coarsely as you like. Toss in the sugar and kala namak or black rock salt. Squeeze the juice of the lemons on top and mix well. Heat the oil in a small pan till it starts smoking. Add the asafoetida and turn off the heat. Let the oil cool a little and then add the red chilli powder to it. Once the oil is completely cool, mix in with the rest of the ingredients. Spoon into  a sterilized bottle and let it rest in the fridge. After three days, the pickle is ready to eat. It keeps well for a month if refrigerated. Just a spoonful with your lunch and let the pickle work its magic!
 

Thursday, July 14, 2016

Homemade Raisins


Its been a while that I've posted on the blog. That didn't mean I wasn't experimenting and turning my kitchen into a lab! The last I posted I was working my way through a large batch of oranges. Well, the oranges met a delicious end. And then came the avalanche of grapes. They found their way onto salads and fruit cream and the monster munchkin's snacks. But just when I thought I was done with them, a whole new bunch would make it to my fridge. This needed large scale tackling and I figured let me save them for a rainy day. Now the only way to make them last intact till the aforesaid rainy day was the sundried way aka raisins.
Now, i am a raisin phobe. Cannot abide those slimy squishy things in any dessert or cake. But hubby dear and monster munchkin like em well enough. And they are great for zinging desserts when we've got company. I trawled the net for various recipes and in the end settled for one I found between the yellowing pages of the first recipe diary I started at the age of ten! It is simple and requires practically no effort from my end, And a few glorious days later, I get rewarded with glossy, granola worthy raisins. It was almost like Farmville all over again!

Ingredients:
Seedless Grapes     1 kg
Water                      1 litre
Milk                        1 tablespoon

Method:
Remove the grapes from the stalk and wash them well. Boil the water and milk together in a deep pan. Add the grapes and continue boiling till the grapes turn a lighter green. Drain well in a colander. Spread out on a thin cloth under the sun. Cover with another thin muslin. After three to four days of bright sunshine, voila, the grapes are now golden raisins!


Thursday, February 4, 2016

Bottle Gourd (Lauki) Soup

There are only three people I know who relish the humble lauki. Baba Ramdev, my grandmother and my lil toddler. Though in all fairness, lil toddler will eat just about anything. What is it about this veggie that puts off people? The blandness say some, the seeds say others. Well, the seeds can be discarded. And as for the blandness, well, that is exactly what makes the veggie so versatile! It happily adapts to any flavour and cuisine.
This recipe is my mum's brainchild. You will never catch her eating lauki, she hates it with such passion! But in an effort to introduce the family to healthy eating, she adapted it to soup and the result was simply delicious! So as you flounder around the market looking for veggies to break your soup monotony, bring home a bottle gourd. I promise you will soon be a convert!


Ingredients:
Bottle Gourd (Lauki)       1, medium
Butter                               1 tsp
Onion                               1, chopped
Milk                                 1
Peppercorns                     6
Chana Dal                        2 tablespoon
Water                               3 cups

Method:
 Peel and cut the lauki in cubes. In a pressure cooker, heat the butter. Saute the onion till just golden. Add the rest of the ingredients. Add some salt to taste. Pressure cook for 7 whistles. Once the cooker cools, remove the solids with a slotted spoon and grind in the mixie. Pour the puree back into the liquid and bring to boil, stirring a couple of times. Serve hot and revel in your latest health choice :)

Wednesday, January 20, 2016

Mom's Onion Soup


Onion soup? I know the name doesn't conjure visions of heartwarming, delicious, soul stirring food. But contrary to what most people think, the humble kitchen staple morphs into a flavourful gourmet extravanganza for the taste buds. The French Onion soup is sought after across the world, and features on the menu of some of the best chefs. 
The original Onion Soup calls for beef stock and cream, and is topped with generous amounts of grilled cheese croutons. Not too healthy for the heart or waist, i agree! Thus, presenting, Mom's Onion Soup. Her version still retains those gorgeous golden caramelized onions, but the rest of it is simple, light and infinitely more healthy. I warn you though, this soup is super addictive. Just ask hubby. He's put in a permanent request that mum make two extra mugfuls for him each time! Coz as they say, " No one can drink just one!!"

Ingredients:
Onions            4, large
Butter              2 tsp
Milk                2 cups
Water              2 cups
Peppercorn     10
Salt                 to taste

Method:
Heat butter in a pressure cooker. Add chopped onions, Saute till the onions are golden. Add the rest of the ingredients and pressure cook for 4 whistles. Cool. With a slotted spoon remove the onions and peppercorns and grind them in a mixer. Add the paste back to the liquid and heat on low flame, just before serving. Yes, it is that simple! And if you are feeling particularly indulgent, serve up with a side of grilled cheese toast ;)


Thursday, December 31, 2015

Mulled Wine


Christmas has just passed and already the new year is upon us! Seems like yesterday that we were ushering in 2015, and now its time to bid it adieu! But there is no sorrow in that. The year has been fair and the new one just offers more to look forward to. For now, I sit back and enjoy the festive air that warms the chill in the wind. I love the happy, carefree feel that comes this time of the year. When we all shed our baggage and Ho Ho Ho our thoughts and speech. It is also the time of year when the vodkas and martinis and sangrias gave way to the more traditional. Tis the season to be jolly... with mulled wine warming my belly! The warm spiced wine gently making its way down my throat. Clearing that lingering cough and cold. Enveloping me in the warm, fuzzy Santa hug. And of course, the best way to use up all that cheap wine languishing at the back of the cupboard! So mull yourself some wine. Pour one for you and yours and wish everyone with all the cheer. Happy New Year guys! Make every moment count!

Ingredients:
Water                             2 cups
Sugar                              1/2 cup
Cloves                            12
Cinnamon                       2 inches
Nutmeg powder              1/2 tsp
Dry Ginger Powder         1/2 tsp
Lemon                             1/2
Red wine                         750 ml
Brandy                            1/4 cup

Method:
Heat water in a pan. Add sugar, spices and lemon. Reduce heat before it comes to a boil and simmer for 10 minutes. Add wine and heat till just below boiling point. Now add the brandy. Turn off the flame. Serve warm in goblets and inhale the festive spirit!

Thursday, December 10, 2015

Super Simple Pumpkin Soup


Winter is Coming! No, Wait! Winter is here! Not in the Stark way. But more of the 'dilli ki sardi' kinds. And how do I know winter's here? Well, the nip in the air and the extra layer of clothes, sure. But what positively heralds the onset of winters at my place is Soup Dinners!
It is another ritual that harks back to my childhood. The moment the weather turned, Mum would chop up those pesky veggies and dish out some awesome soup. Teamed with hot buttered toast and a baked casserole, this was the perfect weekday comfort food. Luckily, hubby dear is also quite the soup fan. Or maybe mum's soups have converted him! Either way, Soup Dinners live on in my household as well. With the toddler yum yumming every warm sip!
Mum's soups were always made fresh, light and flavourful. No gloopy cornflour from a packet for us. Infact soups are so quick and easy to make that it never ceases to amaze me that people choose the pricey preservatives to the fresh route! So, this winter here's my request. Give my soups a try. I promise to convert you! And come summers, your bikini bod will thank you ;)


Ingredients:
Pumpkin, chopped                1 cup
Onion                                     1
Peppercorns                         8
Nutmeg powder                   1/4 tsp
Ginger, chopped                   1 inch
Water                                    4 cups
Salt                                        to taste
Butter                                    2 tsp

Method:
In a pressure cooker, heat the butter. Add the onions and saute till translucent. Add the pumpkin and saute for another minute. Now add the rest of the ingredients and pressure cook for 4 whistles. Cool. Run in the blender till well mixed. Heat on low flame just before serving. Super Simple, didn't I say?!


Friday, November 13, 2015

Hara Bhara Chicken

The weekend is here, finally! And after all the Diwali madness, it is time for some comfort food. Now don't get me wrong. As far as food goes, it is all comfort to me! But right now I feel like some warm brothy chicken with a no fuss attitude and tankards of taste. Light on the masala and heavy on flavour. The kind of soul chicken that you can dip a  couple of slice of bread in (if you are me), or drown your rice in (if you are hubby). The kind of Chicken, that on a nippy November evening reminds you of a warm fireplace and home. Oh, and the kind of chicken that does not require me spending hours chopping, frying, cleaning!
Now this chicken doesn't look the lurid green required of a hara bhara, but there are some greens in there I promise!


Ingredients:
Chicken                      1 kg
Coriander                    1 bunch
Green Chillies             7
Cloves                         4
Black Cardamom        3
Ginger                         1 inch
Garlic                          5 cloves
Mustard oil                 4 tablespoons 
Curds                          2 cups
Kasuri Methi              1/4 cup
Water                          350 ml

Method: Grind together the coriander, cloves, ginger, garlic, cardamom and chillies. Heat oil in a deep pan and add the ground masala. Once the masala browns, and the fat separates, add the curds. Cook for five minutes. Add the chicken and salt. Stir till all the pieces are well coated. Add the water. Reduce the flame to sim. Cover and cook till done. Stir in the kasuri methi. And you are done! Simple, isn't it? 


Sunday, November 8, 2015

Date and Nut Balls

My parents are not traditional. This is a shocker in a country like India. As a result I grew up quite oblivious to the varied customs, rituals and festivities that colour the Hindu calendar. The only exception was Diwali. Every year the house would be lit up with pretty fairly lights and traditional clay diyas would make also make an appearance. The highlight undoubtedly were the array of goodies mum would conjure. A week prior to Diwali she would painstakingly spend hours making sweets and savouries. These included mathri, chakli, namkeen paras, gujiyas and gulab jamuns. She would then decorate a plate with these goodies, add a pretty diya or candle and gift one to each of our neighbours.
When I got married, this was the only tradition I brought with me. Though store bought sweets and attractive edible hampers are now the norm, I still prefer making atleast one sweet and savoury at home. They may not be the traditional ones, but they are made with just as much love.
This year though, I wanted to combine the traditional and the healthy. With a little munchkin added to our crazy bunch, I had to ensure the sweets were not just delicious but also healthy. No more empty calories! When I came across Sonal Chowdhury's Bliss Ball in Good Housekeeping, I knew I had found just the thing. I have tweaked and adapted the recipe a little but these are still nutritious nuggets from heaven! Utterly blissful!!


Ingredients:
Dates                                1 cup
Broken Cashews              1 cup
Almond powder               2 tablespoons
Dessicated Coconut         1/2 cup

Method:
Soak the dates in hot water for 15 minutes. Run the cashews in the mixie for a coarse powder. De-seed the dates and drain the water. Mix the cashews and dates and run them in the mixie together till they form a sticky paste. Turn into a bowl and mix in the almond powder. With wet palms, form into small balls. Roll the balls in dessicated coconut. Store in the refrigerator and serve with a joyous cheer of Happy Diwali!!

Note: The original recipe called for 2 tbsp of cocoa powder but i substituted that with almonds for a kid friendly treat. However, you may choose the chocolate for a twist on taste!


Tuesday, November 3, 2015

Spicy Crunch

I have a confession. Every evening my husband sneaks out and cheats. I can't blame him really. I would too if I had the time. Its an affair that began as kids, and now no matter how much he tries, he always does give in to the temptation. He does feel guilty. Cheating on my cooking that way. But I object more on the grounds that he is cheating on his health. Alas! The allure of street food is a slutty siren you can't ignore!
So in the spirit of good health, I decided to recreate the street food magic in my home kitchen. It may don healthier clothes and svelter calories, but it still packs a mighty punch. The recipe below is a twist on the tangy, fiery, pungent Mudi.
Mudi is made of puffed rice like it's cousin Bhel. But unlike the Bombay and Delhi sweet- tangy bhel, the Mudi of the east is a tangy, pungent mix of puffed rice, spices, nuts and mustard oil. In my version, the puffed rice is replaced by cornflakes. Well, because I had a lot of boxes in my pantry! No compromise in taste though. After all, hubby dear has stopped sneaking out now!


Ingredients:
Cornflakes                         3 cups
Mustard Oil                        8 tablespoons
Roasted Peanuts                 1/2 cup
Sprouted Kala Chana         1/2 cup
Onion                                 1, finely chopped
Green chillies                     4, finely chopped
Red Chilli Powder             1/2 tsp
Chaat Masala                     6 teaspoons
Coriander                           3 teaspoons, chopped

Method:
 Heat the oil in a wok. Add the cornflakes and fry stirring continuously till just golden around the edges. Take off the heat. Add the rest of the ingredients. Adjust the seasoning as per your taste, Garnish with coriander, and serve!

Saturday, October 31, 2015

Besan Laddoos

It was the summer of '88. My uncle was home from his training academy and my grandmum had spent most of her waking hours in the kitchen. She lovingly doled out all his favourite dishes, and cooked enormous amounts of sweets and savouries for him to carry back. One of the many snacks in his care package was Besan Laddoo. These melt in the mouth balls of sweet, addictive goodness were the perfect pop for a quick dessert fix.
When the time finally came for his departure, and all the goodies were being packed, my granny realized something was amiss. The box of laddoos seemed much lighter than she expected. When she opened it, she was aghast! The box was completely empty! Not a crumb in sight. Uh-Oh! It was confession time! Over the past few days I had snuck into the kitchen at every possible opportunity, and popped a couple of them. And before I knew it, well, the seemingly endless supply ran out! In my defence, there were only 50!
Fast forward to the present. Hubby dear is as fond of these laddoos as I am. So I borrowed this recipe from granny. It is a healthier alternative to the traditional ghee dripping, syrup soaked ones. And as I watch the lil one sneak one into his mouth, I know we don't stand a chance! So I am gonna quickly type this out and go grab one while they are still around!


Ingredients:

Besan                    3/4 cup
Melted Ghee         1/2 cup + 1 teaspoon
Sugar                    1/2 cup
Semolina              1/4 cup
Green cardamom     5

Method:

Powder the sugar along with the cardamoms and keep aside. Heat 1 teaspoon of ghee in a wok and roast the semolina till golden, but not brown. Empty onto a plate. Now heat the rest of the ghee in th wok and add the besan. Cook on high flame till darkens and turns red. Take care it doesn't burn, so keep stirring continuously. Add it to the semolina on the plate. Spread this mixture and let it cool till it is luke warm. Now add the powdered sugar. Shape into balls, and pop one for instant gratification ;)


Tuesday, October 27, 2015

Akhni Pulao

In the pre Internet era, I remember my mother meticulously copying recipes from library books and magazines into her diary. Those were also days when she maintained a file filled with recipes clipped from varied newspapers and publications. As a ten year old, this weekly ritual fascinated me. And in an attempt to emulate her, I started my own food file. My love affair with cooking began that day but I rarely revisited the indiscriminate clippings of those early days. 
Recently, however, I was cleaning out the trunk of books and chanced upon the old yellowing clippings. Browsing through those memories I discovered this little gem. Akhni Pulao is a one pot cousin of the Biryani, and ideal for those lazy Sunday brunches. And the quantity is sufficient to feed even last minute weekend guests. So grab a pot and impress everyone this week!


Ingredients:
                   Chicken                         1 kg
                   Rice                               1/2 kg
                   Curds                             250 gm
                   Onions                           3
                   Potatoes                         3
                   Ginger Garlic paste       4 teaspoon
                   Garam Masala               4 teaspoon
                   Cumin seeds                  1 teaspoon
                   Oil                                  8 tablespoon

Method:
             Heat the oil in a pressure cooker. Add the cumin seeds. When they sizzle, add the onions. When the onions are translucent, add the ginger garlic paste, salt, chicken and garam masala. Pressure cook for 4 whistles. Remove from the flame. Cool slightly and add the potatoes, curd and rice. Cover and cook again for 4-5 whistles. And your minimal fuss Akhni Pulao is now ready! Serve up with some salad and raita.

Saturday, October 17, 2015

Quick Mocha Cake


I love baking. I love all its finicky measuring and obsessive temperature control. But there are some days when I still want my cake fix, but minus the long drawn complicated process. Enter the Quick Mocha Cake. Not only is this a one bowl wonder, but it also cooks in double quick time. Really win win in my opinion. Now, the purists can scoff all they want, but the proof is definitely in the eating. And this one is addictively delicious!

Ingredients:
Whole Wheat Flour         1 and 1/2 cups
Cocoa Powder                  1/2 cup
Baking Powder                 1 teaspoon
Baking Soda                     1/2 teaspoon
Milk                                  1 cup
Vinegar                             1 tablespoon
Kahlua essence                 a few drops
Sugar                                 1 cup
Butter                                3/4 cup

Method:
Mix the vinegar and milk. Keep aside for 10 minutes. Sift all the dry ingredients together. Grease a 7 inch square baking dish. Finally, mix all the ingredients well. Pour into the prepared dish. Level it out. Microwave on full power for 7 minutes. Let it rest for a few minutes more. The Quick Mocha Cake is ready.
Slather it with ganache. Or serve up with a scoop of vanilla ice cream. Munch it with some coffee. Or jus eat it as is!

Note: The Kahlua essence can be substituted with a mix of 3 heaped teaspoon instant coffee powder and 1 teaspoon hot water.

Tuesday, September 1, 2015

Fada Ni Khichdi


This recipe is a treasure from Tarla Dalal. Nutritious and filling, this is ideal for those breezy days when one just wants to feel the wind on the face and stay away from chores. This one pot meal cooks in a jiffy and appeals to even the most finicky eater. Eliminate the chillies and you have an excellent meal for babies and toddlers alike.

Ingredients:
Yellow moong dal              1 cup
Broken Wheat ( Dalia)       3/4 cup
Potatoes, diced                    1 cup
Green Peas                          1 cup
Cauliflower florets              1 cup
Onions, diced                      1 cup
Green chilli-ginger paste     1 tablespoon
Peppercorns                         1/2 teaspoon
Turmeric powder                 1/2 teaspoon
Chilli powder                       1 teaspoon
Salt

Tempering:
                  Cinnamon           1 inch stick
                  Cloves                 3
                  Cumin                 1 teaspoon
                  Heeng                  1/2 teaspoon
                  Ghee                    3 tablespoon


Method: Wash and soak the dal and dalia for atleast 15 minutes. Boil 4 cups of water. Heat the ghee in a pressure cooker and add all the tempering ingredients. When they sizzle, Add the drained dal and dalia as well as all the vegetables, spices and salt. Stir and saute for 5 minutes. Add the hot water. Pressure cook for 4 whistles. Allow the cooker to cool. Stir vigorously, adding more hot water if required to thoroughly mix the dal and dalia well. Serve hot garnished with slivers of chillies, and a side of curds, papad and pickle.

Friday, August 28, 2015

Beer Bread

There is something about baking bread that scares even the most seasoned baker. Well, most breads are quite unforgiving. You have to get the quantities just right, proof the yeast, allow it to rise just so..too much and it will be just air pockets, too little and it will be stone... you have to punch, proof, punch again. A rather long and tedious process that may still leave you with results, well, deflated!

This is where Beer Bread comes in. It is a simple, no fuss bread. Like having drinks with your bumchum in pajamas. Effortless! No complicated ingredients or steps, and with a guarantee of success. Don't take my word for it. Just chuck it all in and surprise your folks with some freshly baked bread this weekend. 


Ingredients:
Flour                        3 cups
Baking Powder        4 1/2 teaspooons
Brown Sugar           3 tablespoons
Salt                          1/2 teaspoon
Beer                         1 and 1/2 cup
Butter                       1/4 cup, melted

Method:
Preheat the oven to 180 C. Sift the flour, salt and baking powder together. Thrice. Now that the tough part is over, mix in the rest of the ingredients. Pour into a greased 9x5 inch loaf tin. Top up with some grated cheese if you like. Bake for 50 minutes. Rest for another 15 minutes or so. Turn it out and dazzle!

Wednesday, August 19, 2015

Sheera

Sheera is semolina based dessert that is also known as Sooji ka halwa in the northern parts of India, and is  a close cousin of the southern Kesari. This recipe originates from Maharashtra and differs from the others by its use of milk instead of water. 

Sheera is quite a filling and healthy dish so its often eaten for breakfast or as a weaning meal for babies. As for me, I can eat Sheera anytime, especially when I see the raindrops batter my window and fill the room with the scent of the earth.
This recipe is my granny’s who definitely makes the best Sheera in the world!


Ingredients:

Semolina     1 cup
Ghee           ½ cup
Milk            1 cup, warmed
Sugar           ¾ cup
Banana        1

Method:
Heat the ghee in a wok. Add the semolina and roast till golden. Stirring continuously, add the milk in a slow and steady stream. Cook for a minute and lower the flame. Add the sugar and mashed banana. Mix thoroughly and cover with a lid. Let it cook for another minute. Uncover, mix and cover again. Cook for another minute and switch off the gas. The grains should have separated and lost their stickiness. If not, cook covered on a low flame for another minute. And your sheera is ready to be devoured!
For additional flavour and nutrition, you could add green cardamom powder and garnish with chopped nuts.