Showing posts with label indian. Show all posts

Tuesday, February 16, 2021

Kacchi Haldi Sabzi

I know winters are on their way out, but there is still time to make the most of the abundant produce. While summers are for light, fresh flavours, winters are for decadent indulgence. Eat seasonal all the nutritionists say. So when you gather all those vibrant veggies and dollop everything with fresh ghee, you are basically doing your health a service!
There is truth in it. Indian cooking has always been influenced by the change of seasons and local produce. We have our aamras and jaljeeras in summer. And our til, jaggery and saags in winter. When the veggies are fresh and the body needs extra calories to fight against the harsh weather.
Fresh turmeric or kacchi haldi is a winter essential up north, though relatively unknown as you move to warm and milder south. You will find my entire fam sipping turmeric steeped warm water as the weather gets progressively colder. Or snacking on this delicious Turmeric pickle as the weather oscillates with the onset of spring. 
Another fabulous dish to introduce more of this miracle spice is this lip smacking stir fry. The Kacchi Haldi Sabzi or Fresh Turmeric Stirfry is a little known dish from the state of Rajasthan. It is a fairly traditional preparation that is hard to find in restaurants. And though it involves some laborious prep, I can wholeheartedly say it is worth every second of the effort. 

Kacchi haldi sabzi

Ingredients:
Fresh Turmeric                    250 gm
Carrots                                 80 gm
Peas                                     50 gm
Cauliflower                         50 gm
Ghee                                    150 gm
Curds                                   250 gm
Red chilli powder                1 teaspoon
Coriander powder                1 teaspoon
Green Chillies                      2, chopped
Ginger, grated                      1 teaspoon
Heeng                                   a pinch
Cumin seeds                         1 teaspoon
Black Cardamom                 4
Bay leaf                                1

Method: Peel the turmeric and carrots. Chop finely into small pieces. You can also choose to grate them, but I personally like the slight crunch from the whole pieces. Chop your cauliflower florets into small pieces as well. Add the spice powders and salt to the curds, whip lightly and keep aside. Heat the ghee in a heavy bottom pan. When hot, add the turmeric and lightly fry till golden. Drain and keep aside. Repeat for the rest of the vegetables, frying each separately. Lower the flame, add the heeng, bayleaf, cumin and cardamom to the ghee. Once it sizzles, add the curds. Mix well and add the ginger and green chillies. Once the curd thickens and the ghee starts to separate, add the fried turmeric and vegetables. Mix well, adding a splash of milk if the masala starts to stick to the pan. Continue to cook on low heat till the vegetables are cooked and the starts to leave the sides of the pan. Serve warm, garnished with fresh coriander leaves. Tastes best with Bajre ki rotis!


Sunday, August 18, 2019

Tripura Mutton Curry


Tripura is one of the seven sister states of the North East. Located close to the border, the food of Tripura has a strong influence of Bangladeshi cuisine. The tribal cuisine shares similarity to those of the others in the North east- simple non veg stews with fresh local ingredients.
It is a tall task to find the ingredients for an authentic meal outside the state. Primarily, the fermented fish, Berma, which is a staple in most dishes.
However, my search for an authentic recipe from Tripura that I could recreate, I landed on a vlog. At first sight it seemed like every other Meat curry. But the play of ingredients created something that looked and smelled familiar but tasted unique! Spicy and delicious, I know this recipe is going to be  a weekend staple at my place now! 

Ingredients:
Mutton                     1.2 kg
Onions                     3, sliced
Garlic                       2 whole pods, chopped
Ginger Paste             200 gm
Mustard Oil              300 ml
Bay Leaf                   1
Potatoes                     4
Coriander pd              3 teaspoon
Cumin pd                   3 teaspoon
Turmeric pd               3 teaspoon
Red chilli pd              2 teaspoon
Whole red chillies     8
Water                         500 ml
Paste 1: 2 onions + 10 green chillies
Paste 2: 4 green cardamoms + 4 inch cinnamon stick

Method:
Heat the oil in a wok. Fry the potatoes with some salt and turmeric, till crisp and golden. Drain and keep aside. Fry the sliced onion till crisp. Add the mutton, bay leaf, turmeric powder and salt to taste. Saute for five minutes. Add the ginger paste, red chilli powder, coriander powder and cumin powder. Mix well. Cover and cook for 10 minutes. Mix in Paste 1. After two minutes, add the chopped garlic. Stirring at regular intervals. cook till the water dries up. Adjust the seasoning. Heat the water in a pressure cooker. Add the meat, potatoes and whole red chillies. Mix well and pressure cook for 4 whistles. Release the steam and add Paste 2. Pressure cook for another 2 whistles and leave to cool. Serve with some steamed rice for the perfect Sunday Meal!


Thursday, May 10, 2018

Stuffed Karela

Karela or the bitter gourd is not a veggie that turns up often on search engines. I haven't found too many people enthused by the idea of having karela for lunch. And the few who do, have it mainly for the health benefits it has to offer. Not for love of the vegetable. 
I genuinely do love karela. This puzzles as well as aggravates Mum. She absolutely abhors Karela. But love for her only child forces her to dish it up week after week! But there is only one way she deigns to consume it. Stuffed and deep fried. Health benefits be damned!
My grandmum makes this amazing bitter gourd curry with coconut and garlic. But nothing will induce mum to eat that. This recipe was handed to her by one of their neighbours. So for years these were referred to as Chandel Aunty Karelas!
These aren't as bitter as the other recipes. And the tangy, spicy filling is really quite addictive. Throw in a handful of french fries on top, and even kids will have a go!


nuttyaboutfood

Ingredients:
Bitter Gourd                 6
Onions                          2
Ginger garlic paste        2 teaspoon
Garam Masala              1/2 teaspoon
Pepper powder              1/2 teaspoon
Dry Mango powder      1 teaspoon
Coriander powder         1 teaspoon
Salt                                to taste
Turmeric powder          1/2 teaspoon
Chickpea flour              2 tablespoons

Method:
Scrape the ridges of the karela. Slit it vertically and discard the seeds. Rub a little salt and turmeric inside and out. Leave in the sun for an hour. In the meantime, prepare the masala. Grate the onions, add salt and leave for 20 minutes. Squeeze the onions well to drain out all the water. In the drained onions, add all the rest of the ingredients, except the chickpea flour. Wash the karelas well and pat dry them with a kitchen towel. Fill the prepared masala into the cavity of the gourd. Now prepare a thick paste with the chickpea flour (besan), a little salt and water. Use this paste to seal the edges of the stuffed karelas. Heat oil in a wok and lower the karelas sealed side down. Cook on medium heat. You can choose to deep fry these. Or shallow fry them covered , turning them frequently to ensure they are well browned on all sides. Enjoy with some rice and plain yellow dal!


Tuesday, October 24, 2017

The Leftovers Cake

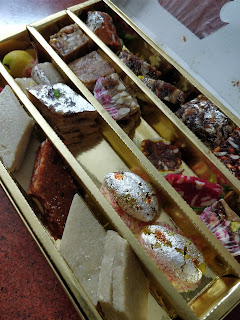
The Diwali frenzy has died down. The diyas have been washed and stored away. The fairy lights have been brought down and carefully returned to their boxes. The din of the crackers had quietened. The belts have loosened a notch. And the fridge is groaning under the weight of the mountain of mithais!
While we wait an entire year to indulge in these special Diwali sweets, the week long exchange makes us groan at the sight of yet another laddoo or barfi
Short of giving it away or crumbling it into yet another kheer or dessert, there aren't too many options around. But this year I decided to be inventive!


While the overdose of mithais had everyone gagging sweet, the realm of cakes had been untouched. If I could reinvent the barfis into a less sweet, unconventional tea cake, I was sure it would  find many takers. 
My inspiration came from the delicious Mawa Cake. This east meets west fusion was perfect for the cake I had in mind. After all, most mithais had a generous base of mawa to complement the dry fruits tucked within. Armed with a random mix of Kaju katlis, anjeer barfi, pista rolls and lavang latikas I set out to bring my experiment to life.
The result you ask? This gorgeous golden hued, light as air cake. The crust was crisp and inside was all soft sweetness. Redolent with the fragrance of mawa and dry fruits, this cake was an instant hit with the young and old alike. People came back for seconds. And thirds! Dipped into tea. Warmed for a quick snack. Topped with shrikhand for a rich dessert. This was definitely the most versatile product of my Diwali Leftovers! 
My fridge is emptied of all the excess mithai that lay unwanted. And I have a house filled with cake satiated tummies! Now if only someone can find a way to recycle all that Son Papdi!


nutsaboutfood

Ingredients:
Leftover Mithai                200 gm
Maida                               200 gm
Butter                               200 gm
Powdered Sugar               150 gm
Cardamom powder          1/4 teaspoon
Baking Powder                1 teaspoon
Eggs                                 4

Method:
Pre heat the oven to 180 C. Beat the butter and sugar well, till it is light and fluffy. Mix in the crumbled mithai. And beat well, till the batter is smooth. Sieve the maida, cardamom powder and baking powder and fold into the batter. Beat the eggs and incorporate into the batter. Mix everything well to get a smooth, consistent batter.
Alternately, if effort is not your thing, just whizz everything together in a food processor or mixie. Pour into a greased baking tin and bake for 45 minutes till a skewer inserted comes clean. Cool and slice!

Saturday, August 19, 2017

Gulab Jamun Cake

Traditional Indian Mithai and Cake? Doesn't sound quite right does it?! To most it seems incredulous that one carry marry the flavours of the Indian dessert palate with that of the European ones. But having successfully attempted the hugely popular Mawa Cake, I knew not only was it possible, but it was absolutely divine! A warm homecoming with the heady aroma of baking. 
Now those who have read my very first post, know that baking for my grandfather can be quite a challenge. But I hadn't been around for his birthday in a long time, and I really wanted to bake him something special. 
My news feed of late had been flooded with stories of Rasmalai Cake. While I personally don't enjoy rasmalai, it did give me an idea. I knew I had to make a cake that had its roots in the familiar. It really was a no brainer then. No dessert is ever as popular as the Gulab Jamun, and I knew I had to attempt yet another G-jam makeover.


I started my research and realized there had been a few attempts at recreating the magic, but nothing I looked at really hit the note. I read on and picked the brain of another Baking Diva I know. Also, Monster Munchkin would want to be part of the process, so I needed something simple yet drool worthy! This recipe seemed about right. But it needed a little more to make it truly festive and celebratory. I played with a few suggestions that would complement and not overpower the actual cake. And most importantly not push it to the realm of the too-sweet-for-seconds shelf. 
To be honest, I had my reservations even when I put the finishing touches. What if it was a total disaster? It seemed perfect on paper. The cake was light and baked to perfection. The frosting was not just a mouthful of oversweet fluff, and very consciously incorporated the only mithai my munchkin deigns to eat.  But what if my instincts were a little off! Heart in mouth, I carted it to my grandparents' place. Sure, it looked good. But aah! The all important taste test was still waiting. 
The first forkful, and my grandfather declared it a success! And it had nothin to do with the fact that his granddaughter and great grandson had baked it. For once, even my worst critic (Me!), had to nod in agreement. This was one for the kitchen heirlooms. A dessert that was going to grace my table many more times in the future!


Ingredients:

Cake:
Gulab Jamun Mix             3/4 cup
Whole Wheat Flour          3/4 cup
Sugar                                 3/4 cup
Milk                                  1 cup, warm
Vinegar                             1 tablespoon
Baking Powder                 1/2 teaspoon
Baking Soda                     1/4 teaspoon
Oil                                     1/4 cup
Salt                                    a pinch
Green Cardamoms            6

Frosting:
Kalakand                          200 gm
Almonds                           8
Cream Cheese                  180 gm
Gulab Jamuns                   8 small

Method:
Preheat the oven to 180 C. Mix the vinegar in the milk and keep aside for 15 minutes. Powder the sugar with the cardamoms. Sift all the dry ingredients together and give it a twirl with a wire whisk or spoon. Make a well in the center and add the rest of the cake ingredients. Whisk it well by hand or electric whisk till well blended. Bake in a greased 8 inch round pan for 35 minutes. Let it cool completely.
Upturn the cake onto a plate and slice horizontally in the middle. Liberally soak the two halves with the syrup from the gulab jamuns. Keep aside for 10 minutes. Lightly beat the cream cheese with a fork till fluffy. Spread a thin layer over the soaked halves. On the lower half, arrange sliced gulab jamuns to cover the entire area. I sliced my gulab jamuns into three parts, but it depends on the size if the jamuns. Now place the top half of the cake over this layer. The two halves reconciled, it was time for the final touch. Run the Kalakand in the mixer till smooth and mix into the remaining cream cheese. Generously swirl over your cake, letting your inner artist run free. Slice the almonds into chunky flakes and drop all over the frosted cake. 
I refrigerated the cake overnight and then brought it to room temperature before serving. But if your will power is being tested, you can dig in right away!


Thursday, February 16, 2017

Keto pork

Love is in the air. As are chocolates and all things sweet. Now I could make a grand Valentine gesture with a cake. But that would be more for me than Hubby Darling. He's never had a sweet tooth, and now that he's on Keto he happily gives desserts a miss. 
He does ecstatically indulge in his favorite foods, though. The ones that make Keto a dream diet for him. Over the past few months, we've been happily experimenting with varied versions of deliciously rich meats. And the most Keto friendly has been Pork. Needless to say Hubby is over the moon! The Goan Pork Sorpotel had been a firm favourite, but we've had to retire that as it wasn't very keto. That left us with the Arunachal style and the mince with spinach. Now Hubby doesn't mind eating the same day in and day out, but how could I let this creative challenge slide?!
Inspired by the simplicity and clean flavours of the Junglee Maas, the Keto Pork was to take a similar direction. Only this time I wanted the flavours to be fresher, sharper. And also closer to the Bhutanese Ema Datshi. 
The Keto Pork has minimal ingredients that are easy to find and yet maximize the taste. It has a familiar warmth reminiscent of Maa ke Haath ka khana. Even if your Maa didn't cook pork! Like most recipes, this one is pretty adaptable. If pigs make you squeal, use meat or chicken. Just amp up the fat factor as they don't have the same amount of fat as our Oink Oink! You can tone down the chillies. Swap the herbs. Play around and make the flavours truly your own!


Ingredients: Pork with Fat                      1 kg
                      Ghee                                   8 tablespoons
                      Green Chillies                    20
                      Garlic with green tops        12
                      Coriander leaves                 1 bunch
                      Peppercorn                          20 (coarsely crushed)
                      Salt                                      to taste

Method: Grind together the green chillies, garlic and coriander. I prefer it coarse for a rustic flavour, but you can keep it as coarse or fine as you like. Heat the ghee in a heavy bottomed pan. Add the pork pieces and saute till the edges turn a little crisp and golden. Add the rest of the ingredients and mix well. Add water just below the level of the meat. Turn the gas down to sim. Cover and cook till done, stirring occasionally. Soup it up or chow down with some cauliflower rice. Happy Ketoing!


Tuesday, January 10, 2017

Kheer Komola

The new year is upon us. A whole 365 days filled with opportunities. And given the blogosphere trend, this post should be about resolutions and hope. But I am perennially optimistic and I really don't do resolutions. If I did I would have long ago vacated my warm couch, and walked out battling the real world. Instead I choose happily to sink further into my warm spot, snuggle my dog and monster munchkin closer and go tap tap on my browser.
Its not that I don't like interacting with the physical world. It is jus that I am plain lazy! I remember when my friends raved about the benefits of retail therapy, all I could think was why anyone would abandon their pajamas and blanket to battle crowds and look at racks and racks of the same boring stuff!
Then online shopping came along and my brain went Aah! This makes more sense. So there I was indulging in some post festive, end of reason sales therapy when I chanced upon Santrawale. They sell, well, oranges! Not just any oranges though. Organic, sustainable, sourced from farm oranges. They had me at Organic! So tappity tap and I had two dozen juicy Nagpur oranges on their way. 
Now if you've browsed my previous orange post you will know that I was suddenly struck with the question again. What the heck do I do with all those oranges. The marmalade batch was still going strong so that option was out. Wine was option two. But that was really a long term project. 
The new year demanded a new approach. (There I've done my bit of following blog trends) I needed something different. Something unexpected. Out came the journals and cookbooks. 
Kheer Komola popped up twice. Milk and Oranges? Sounds like a recipe for disaster right? And yet there were people out there enticing me to give it a swing. It was too cold for a souffle, but a dessert was definitely on my mind. Did I dare to try? 
It wouldn't be my first attempt at Orange Kheer, to be honest. A long time ago I had ignored mum's words of wisdom and experimented for a dinner party I was hosting. The recipe had been tried and tested by Good Housekeeping so what could possibly go wrong? Plenty, as it turned out! Instead of the refreshing, creamy dessert I ended up with a bowlful of dense gloop with a bitter aftertaste. To their credit, my guests actually ate their dessert and assured me it wasn't that bad. That disaster still loomed large in my food memories. And I do have this annoying need to conquer all peaks. So I geared up for round two of Kheer Komola challenge.
This time I was better prepared. I turned to friend Google and read every variation I could find. I said a short prayer. Brushed aside mum's skepticism and dad's ribbing. Nothing ventured, nothing gained. Ignoring the monster munchkin's calls I concentrated completely on my kheer karma. And it paid off! I was finally rewarded with a creamy yet light dessert that brought with it the promise of a refreshing spring with its delicate citrus touch. (Yes I can poetically romance food.) This was Kheer Komola the way I had imagined it. And so you can put away your search results. Go on and benefit from my Experiments with Oranges! And be prepared for friends and folk to be wowed by your brave and unusual dessert masterstroke.


Ingredients:
Milk                              2 litres
Oranges                         7
Sugar                             10 tablespoon
Green Cardamoms         5 or 6
Saffron                           a few strands

Method:
Heat the milk in a heavy bottomed pan. Once it boils, reduce the flame to the lowest and let it simmer. Soak the saffron stands in a tablespoon of the warm milk and keep aside. In the meantime, separate the segments of the oranges. Carefully, split the segment and discard the thin outer membrane. The white membrane is what caused the bitterness in my previous attempt. Remove all seeds as well, taking care to preserve only the pulp and juices of the oranges. It is a monotonous and exacting task, but then that's what makes this kheer so special. It is actually a labour of love! Powder the cardamoms, and don't forget to stir the milk every once in a while, scraping the bottom to ensure it doesn't stick and burn. Once the milk has reduced to less than half the quantity, blushing with a creamy hue, stir in the sugar, cardamom powder and the saffron soaked in milk. Let it simmer for another five minutes and then turn off the heat. Let the milk cool to lukewarm and then gently stir in the orange pulp. Allow the milk to be infused with the citrusy goodness overnight or for atleast four hours, If you are in warmer climes, serve this chilled and topped with pistachios. If like me you are freezing and need a reminder of the spring to come, serve the kheer at room temperature. And if like my father you want everything piping hot, just zap a bowlful in the microwave for 30 seconds. Either way, you won't be disappointed. 


Tuesday, November 22, 2016

A Spoonful of Immunity: Turmeric Amla Pickle


" Aah! You can feel the healing goodness travel through your entire being," exclaimed Mads Masi with every bite. That definitely had my attention. I backtracked to the table to get better acquainted with this health bomb I had missed. Never would I have guessed that the bowl of blinding sunshine I had dismissed as just another chutney was the reason for the health hallelujah! 
Turmeric and Amla Pickle. Yet another ingenious method Nani had devised to sneak immunity into our daily food. And its no grandma's tale, really. Science has backed the benefits of the Indian gooseberry for years. And turmeric of course, is already hailed as the super-food of 2016.

Turmeric has proven anti-inflammatory properties. It has been known to reduce the risk of cancer, normalize insulin levels, banish aches and arthritic pain, promote healthy digestion and boost brain function. Now, I could list all the proven benefits in detail, or you could just read them here and here.
As for Amla , the humble and much ignored Indian Gooseberry is loaded with Vitamin C making it ideal to stave off those pesky coughs and colds. The high iron content is great for combating anemia and getting that gorgeous glow. It is also a known agent for stabilizing blood sugar, promoting heart health and also the high fiber content means bye bye constipation.
On their own turmeric and amla are a little strong to munch. But toss them together in this super healthy and you will have the entire family lining up to get their daily dose. Bursting with freshness and flavour, who would have thought great health came in such chatpata form!
And yes, Mads Masi was right! You can truly feel the healing goodness travel through your entire being!

Ingredients:
Raw Turmeric Root        250 gm
Amla                              250 gm
Lemons                          3
Kala Namak                  to taste
Sugar                             3 teaspoon
Oil                                 2 tablespoon
Asafoetida                     a pinch
Red chilli powder          1/4 teaspoon

Method:
Grate the turmeric and amla as finely or coarsely as you like. Toss in the sugar and kala namak or black rock salt. Squeeze the juice of the lemons on top and mix well. Heat the oil in a small pan till it starts smoking. Add the asafoetida and turn off the heat. Let the oil cool a little and then add the red chilli powder to it. Once the oil is completely cool, mix in with the rest of the ingredients. Spoon into  a sterilized bottle and let it rest in the fridge. After three days, the pickle is ready to eat. It keeps well for a month if refrigerated. Just a spoonful with your lunch and let the pickle work its magic!
 

Saturday, October 29, 2016

Bread Gulab Jamuns

Gulab Jamuns could truly be the most pan-Indian dessert. Found in every corner of the country, big and small, the flavour rarely varies despite the regional twists. Rose, kewra, cardamom, saffron... the gulab jamun still tastes just like home. 
I have yet to meet a person who doesn't like gulab jamuns. Or G-Jams,  to borrow a term from my cousin. Even those who prefer savoury over sweet can rarely resist the call of the G-Jam! Really, what's not to like? Golden, fried dumplings soaked in cardamom scented sugar syrup. Exotically delicious, yet endearingly simple!
The commercially available G-Jams are usually made of khoya. And homemakers like mum choose the less complicated route of instant G-Jam packets that use milk powder for a smoother, lighter version that is a lot less complicated than the original. And then there is a third, more unorthodox version. The Bread Gulab Jamuns!
I was first introduced to the bread version during my college years. Homesick on diwali, one of our friends surprised my roomie and me with a huge box of gulab jamuns. Made by his fauji mess cook. As we popped the first one into our mouth, he dropped the B-word! These were made with regular white bread! Despite being a foodie and a cooking enthusiast, I would never have guessed had he not told us! As for the taste? Suffice to say I disappeared with the entire box, coz, " Joey doesn't share food!"
I've been looking for the perfect recipe ever since and after many years of trial and error, I've created one that would have made the old Cook baba proud!


Ingredients:
Bread                        12 slices (I used wholewheat)
Custard Powder        3 tablespoon
Baking Soda             1 teaspoon
Milk                          2 cups
Sugar                        1 1/2 cup
Water                        1 1/2 cup
Cardamoms              3
Oil                             to deep fry

Method: Trim the edges of the bread. Soak a slice of bread in milk and squeeze to remove the excess. Repeat with all the slices. Run the crumbled, wet bread with the custard powder and baking soda in the food processor. Gently pulsing twice to obtain a smooth yet firm paste. Heat the sugar, water and crushed cardamoms in a deep pan till the syrup reaches a sticky, one string consistency. Take off the heat. Meanwhile, gently form the bread paste into smooth balls. Take care not to press too hard while rolling them or the consistency will not be spongy. Heat oil and gently drop the bread jamuns few at a time. Cook over medium heat so that the outside doesn't brown before the inside cooks. Once they are evenly golden, drain on kitchen paper and transfer to the warm syrup. Repeat with all the G-Jams. You can eat them warm or chill them in the refrigerator to serve later. Either way, they are easy to make and are always a blockbuster hit!


Saturday, October 15, 2016

Junglee Maas


My grandfather was eighty plus when one fine day he loaded a rucksack into the back of our jeep. Picked up an old army pal of his and drove straight across the country, from the south to the north east. We had no clue where he had gone or when he would be back. A month later he returned, with a rejuvenated laugh and a twinkle in his eye. And a huge wild boar in the back. Ready to be skinned and pickled.
Shikaar! Aah! That word throws up romantic images of tough men on horseback or open jeeps, rifles slung on the shoulders, tracking the elusive beast through dense jungles. Fearless and focused. Images of late night campfires and rustic food. Smells of sweat, rum and meat mingling with the smoke and the cool night air. 
I've never been on a shikaar or hunting expedition. But the vivid recollections of my father and grandfather transport me to those adrenaline fuelled times. When being true to the roots also meant being in touch with the most basic survival skills handed down by the primitive tribe. 
Hunting expeditions often lasted for days and meals had to be rustic and basic. Carrying fancy ingredients was out of the question. The meat was shot fresh and the only spices used were those that would not perish in the punishing heat. Out of these expeditions was born the hunter's Junglee Maas. A one pot dish with no frills and just a wholesome meaty flavour. High on calories and protein, this was the perfect meal to energize travel weary bones and sore muscles.  


The original recipe calls for ghee, red chillies, salt and of course, meat. The resultant dish is a mildly spiced, juicy and tender meat, crowned by a flaky and crisp exterior. A contrast that delights with every bite. The gravy is thin with a buttery goodness. And if you make it under a starry sky on an open fire, the smokiness from the wood will elevate it to a whole other dimension. 


Ingredients:
Goat Meat                 1 kg
Dry Red Chillies       20
Ghee or Butter          250 gm
Salt                            to taste

 Method: Melt the ghee/butter in a deep pot. Add the meat and the red chillies and cook for a medium flame till all the pieces are generously coated with the ghee. Add the salt and just enough water to reach the level of the meat pieces. Reduce the flame and cook covered till the meat is done. Stir occasionally, adding water if the dish starts to dry. Slurp it like stew, soak it with bread or serve up with some steamed rice.


Sunday, September 4, 2016

Meat pickle

I can't stop dancing. Or singing. Its that time of the year finally! Time for my annual vacation home. Three weeks of doing absolutely nothing. Three weeks of being completely pampered by mum and dad. And three weeks of gorging on all my favourite food, cooked not by me, but by mum, granny, aunt and my darling Robert uncle! And yes, I absolutely aim to overindulge!
Last Sunday as we sat making plans for the upcoming vacay, Hubby Dear issued a dire warning against pilfering his share of the meat pickle this year. You see, every year when we go home, Mads Masi bottles a jar of the most sinfully addictive meat pickle, exclusively for HD. It was great in the earlier years when I was following a vegetarian diet. But then I returned to the meat fold, with a vengeance! So when last year's batch made its way to us, HD was none to happy he had to share. But imagine his disappointment a couple of hours later when he poured himself a chilled beer and headed to spoon a few pieces of his favourite snack. The pickle jar was empty! In my defence, running after the monster munchkin all day is hungry work. And did I mention the pickle is sinfully addictive?!
He was of course mollified when Masi bottled a batch specially for him and I swore to keep my fork away. 
The memory though, remained. Hence, the dire warning! And that was what led to my sleepy sunday turning into a sweaty one. Ever had one of those moments when you share a food memory and the description is so vivid you can almost taste it in your mouth. And so strong is that sensation that you just have to have it. Like right that moment. Or your tastebuds will drive you nuts as you drool unchecked?! Well, lets just say we needed our meat pickle fix. Right that moment. A week was too far away!
A frantic call to Masi for the recipe and we were raring to go! The only hitch? Goat's meat wasn't available! But as my friend said, Baa ain't too far from Oink. So pork it would be! The promise of that tangy, tasty pickle spurred everyone into action. HD took off to bring us the choicest cuts. And Oink Friend helped peel, chop, grind and stir. And stir. And stir! And...excuse me, while I go polish off that last forkful ;)


Ingredients:
Meat (boneless)       1 kg (goat/beef/pork/lamb)
Mustard oil              1 1/2 cups
Ginger                      100 gms
Garlic                       125 gm
Vinegar                     1/3 bottle
Sugar                         a pinch
Garam Masala          1 heaped tablespoon
Salt                            to rub

Method:
Wash the meat well and rub the pieces with salt. Keep aside for two hours. Grind the ginger and garlic to a fine paste. In a heavy bottomed pan, heat the oil on high flame and saute the meat. When the pieces start shrinking, and the meat is half done, add the ginger garlic paste. Reduce the flame to the minimum. Add cook till the meat is done. Stir frequently in between to ensure the meat doesn't stick to the bottom of the pan. Add the sugar and garam masala and cook for another five minutes. Let it cool for 1/2 an hour. Stir in the vinegar and store in sterilized jars. If the weather is warm, it is better to keep the pickle refrigerated. It will keep in refrigerator for a couple of months. Provided of course, you have the willpower ;)

Monday, April 25, 2016

Pork Sorpotel

My earliest memory of my uncle was of a tall, mustachioed guy with a booming voice. It was dislike at first sight. How dare this loud creature take my delicate Masi away from us. I clambered furiously up to my aunt's arms and declared. " Masi iss aadmi ke saath nahi jayegi!" (My aunt shall not leave with this man!) No one paid heed to my decree. And for that i am grateful!
Over the years I came to adore him. He was a madcap friend with a great taste in music and a shared love for PJs and puns! He was a neatness freak who drove us crazy. He was the life of the party, always up for a pint. And he was a insatiable foodie who was also a fantastic cook!
Sunday afternoons at his place usually meant beer, conversation and pork. Cooked with his meticulous perfection and served with a whole lot of love. When I started my food blog, he was always the first to leave a comment. He was my testbed for some of the more experimental recipes. And he always complained that I didn't devote enough space to his favorite red meat!
The last time I met him, I promised I would perfect my skills and wow him with the ultimate pork dish. And I did! Perfect it. But I still needed his final approval on it. I clicked a pic and sent it across. He texted that it looked tempting and he was looking forward to the taste test. Alas! That shall never be. He was taken away too soon, too sudden.
This post is in your memory my MeshoMoshai ( I can see your eyebrows shoot up and your mouth hang in shock at that traditional address!) I guess I'll have to wait till I join you up there for your seal of final approval. Till then, I know you look down and send me all the love and luck. And plentiful beer to go along with this spicy Pork!


Ingredients:
Pork                        1 kg
Red Chillies            25
Coriander seeds      1 tablespoon
Peppercorns            15
Garlic                      10 cloves
Cinnamon               2 inch
Tamarind                an onion sized ball ( roughly 5 tablespoon)
Turmeric                 1 tsp
Cumin                     4 teaspoon
Onions                    4
Green chillies         6
Ginger                    2 inches
Vinegar                  1/4 cup
Sugar                     1/2 teaspoon

Method: 
Finely chop the onions, ginger, garlic and green chillies. Grind together the rest of the ingredients except pork and sugar. To the pork, add just enough water to reach the level of the meat. Boil pork till it becomes light pink in colour. Add the ground masala, the chopped ingredients and salt to the pot. Pressure cook for 30 minutes. Once the cooker cools, add the sugar and thicken to the consistency you like. Serve hot with steamed rice and chilled beer!


Tuesday, February 9, 2016

Quickie Dahi Chicken


I love my new kitchen! It is large enough for monster munchkin to potter at one end, whilst I experiment and blog at the other. Of late though, he hasn't been content just stirring empty pots. He often wanders over to my cooking area demanding, " Mamma, Up!", to get a closer look at all the bubbling and sauteing. Do I have a chef in the making? Too early to say. But this recipe is definitely the munchkin's brainchild. I dare take no credit for it.
As I stood staring at the chicken, wondering just what treatment I mete, the lil one coolly sauntered over insisting I take the onion he had brought. He kept going back and bringing ingredient after ingredient. All I had to do was put it all in the mixer and let him grind the masala dancing on his tiptoes! Thus was born the quickest, most delicious chicken I have ever tasted. But don't  take my word for it! Give it a whirl and I am sure it will become a permanent in your repertoire. After all, even a two year old could whip it up ;)

Ingredients:
Chicken                          1 kg
Curds                              1 cup
Onion                              1, large
Garlic                              6
Green chillies                  6
Dessicated coconut         1/4 cup
Water                              1 cup
Mustard oil                     2 tablespoon

Method:
Grind the onion, chillies, garlic, curds and coconut together. Heat the oil in a pressure cooker, Add the ground masala. Cook for two minutes. Add the chicken and salt. Stir well till all the pieces are coated. Add the water and pressure cook for four whistles. Told you it was a quickie!

Note: Dessicated coconut is also know as dry coconut powder or nariyal bhoora.


Thursday, February 4, 2016

Bottle Gourd (Lauki) Soup

There are only three people I know who relish the humble lauki. Baba Ramdev, my grandmother and my lil toddler. Though in all fairness, lil toddler will eat just about anything. What is it about this veggie that puts off people? The blandness say some, the seeds say others. Well, the seeds can be discarded. And as for the blandness, well, that is exactly what makes the veggie so versatile! It happily adapts to any flavour and cuisine.
This recipe is my mum's brainchild. You will never catch her eating lauki, she hates it with such passion! But in an effort to introduce the family to healthy eating, she adapted it to soup and the result was simply delicious! So as you flounder around the market looking for veggies to break your soup monotony, bring home a bottle gourd. I promise you will soon be a convert!


Ingredients:
Bottle Gourd (Lauki)       1, medium
Butter                               1 tsp
Onion                               1, chopped
Milk                                 1
Peppercorns                     6
Chana Dal                        2 tablespoon
Water                               3 cups

Method:
 Peel and cut the lauki in cubes. In a pressure cooker, heat the butter. Saute the onion till just golden. Add the rest of the ingredients. Add some salt to taste. Pressure cook for 7 whistles. Once the cooker cools, remove the solids with a slotted spoon and grind in the mixie. Pour the puree back into the liquid and bring to boil, stirring a couple of times. Serve hot and revel in your latest health choice :)

Monday, December 21, 2015

Oil Free Chicken Raja Mircha


  • Those who have been following this blog would have realized that I am rather partial towards food that is light, wholesome, simple but packs a flavourful punch. This new recipe is no exception. I found the original on soulkitchendiaries and knew it was just what I needed to kickstart the winter weekend on a healthy note. I tweaked the recipe a little, playing around with the flavours from the North eastern part of India. It's an addiction I cannot curb! The result was sublime. Need I say more?


Ingredients:
Chicken                  750 gm
Water                      1 litre
Onions                    3, large
Tomatoes                4, large
Raja Mircha            2
Green Chillies         3
Ginger                     1 inch
Garlic                      6
Coriander leaves      1 cup
Mint leaves               1 cup
Coriander powder     1 tsp
Garam Masala          1/2 tsp
Turmeric                   1/2 tsp
Bamboo Shoots         1/2 cup

Method: 
Grind the onions to a paste. Puree the tomatoes. Grind the mint and coriander leaves coarsely. In a mortar and pestle, coarsely pound the ginger, garlic and green chillies. In a heavy bottomed pan, bring the water to a boil. Add all the ingredients, except the chicken and bamboo shoots. Add salt and bring to a boil once again. Add the chicken and bamboo shoots and cook on high flame for ten minutes. Reduce the flame to sim. Cover and cook till the chicken is done. Serve hot with steamed rice, and do invite me over to slurp some!

Notes: 
1) Raja Mircha (King Chilly/ Boxer Mirchi/ Naga Chilly) is rare to source and also too hot to handle for most palates. So feel free to substitute with any regular dry red chillies,
2) Bamboo Shoots are an acquired taste. Also, like Raja Mircha they are hard to find in the mainstream markets. You can easily substitute with fresh green beans or even potatoes for an equally tasty dish.


Friday, November 13, 2015

Hara Bhara Chicken

The weekend is here, finally! And after all the Diwali madness, it is time for some comfort food. Now don't get me wrong. As far as food goes, it is all comfort to me! But right now I feel like some warm brothy chicken with a no fuss attitude and tankards of taste. Light on the masala and heavy on flavour. The kind of soul chicken that you can dip a  couple of slice of bread in (if you are me), or drown your rice in (if you are hubby). The kind of Chicken, that on a nippy November evening reminds you of a warm fireplace and home. Oh, and the kind of chicken that does not require me spending hours chopping, frying, cleaning!
Now this chicken doesn't look the lurid green required of a hara bhara, but there are some greens in there I promise!


Ingredients:
Chicken                      1 kg
Coriander                    1 bunch
Green Chillies             7
Cloves                         4
Black Cardamom        3
Ginger                         1 inch
Garlic                          5 cloves
Mustard oil                 4 tablespoons 
Curds                          2 cups
Kasuri Methi              1/4 cup
Water                          350 ml

Method: Grind together the coriander, cloves, ginger, garlic, cardamom and chillies. Heat oil in a deep pan and add the ground masala. Once the masala browns, and the fat separates, add the curds. Cook for five minutes. Add the chicken and salt. Stir till all the pieces are well coated. Add the water. Reduce the flame to sim. Cover and cook till done. Stir in the kasuri methi. And you are done! Simple, isn't it? 


Sunday, November 8, 2015

Date and Nut Balls

My parents are not traditional. This is a shocker in a country like India. As a result I grew up quite oblivious to the varied customs, rituals and festivities that colour the Hindu calendar. The only exception was Diwali. Every year the house would be lit up with pretty fairly lights and traditional clay diyas would make also make an appearance. The highlight undoubtedly were the array of goodies mum would conjure. A week prior to Diwali she would painstakingly spend hours making sweets and savouries. These included mathri, chakli, namkeen paras, gujiyas and gulab jamuns. She would then decorate a plate with these goodies, add a pretty diya or candle and gift one to each of our neighbours.
When I got married, this was the only tradition I brought with me. Though store bought sweets and attractive edible hampers are now the norm, I still prefer making atleast one sweet and savoury at home. They may not be the traditional ones, but they are made with just as much love.
This year though, I wanted to combine the traditional and the healthy. With a little munchkin added to our crazy bunch, I had to ensure the sweets were not just delicious but also healthy. No more empty calories! When I came across Sonal Chowdhury's Bliss Ball in Good Housekeeping, I knew I had found just the thing. I have tweaked and adapted the recipe a little but these are still nutritious nuggets from heaven! Utterly blissful!!


Ingredients:
Dates                                1 cup
Broken Cashews              1 cup
Almond powder               2 tablespoons
Dessicated Coconut         1/2 cup

Method:
Soak the dates in hot water for 15 minutes. Run the cashews in the mixie for a coarse powder. De-seed the dates and drain the water. Mix the cashews and dates and run them in the mixie together till they form a sticky paste. Turn into a bowl and mix in the almond powder. With wet palms, form into small balls. Roll the balls in dessicated coconut. Store in the refrigerator and serve with a joyous cheer of Happy Diwali!!

Note: The original recipe called for 2 tbsp of cocoa powder but i substituted that with almonds for a kid friendly treat. However, you may choose the chocolate for a twist on taste!


Tuesday, November 3, 2015

Spicy Crunch

I have a confession. Every evening my husband sneaks out and cheats. I can't blame him really. I would too if I had the time. Its an affair that began as kids, and now no matter how much he tries, he always does give in to the temptation. He does feel guilty. Cheating on my cooking that way. But I object more on the grounds that he is cheating on his health. Alas! The allure of street food is a slutty siren you can't ignore!
So in the spirit of good health, I decided to recreate the street food magic in my home kitchen. It may don healthier clothes and svelter calories, but it still packs a mighty punch. The recipe below is a twist on the tangy, fiery, pungent Mudi.
Mudi is made of puffed rice like it's cousin Bhel. But unlike the Bombay and Delhi sweet- tangy bhel, the Mudi of the east is a tangy, pungent mix of puffed rice, spices, nuts and mustard oil. In my version, the puffed rice is replaced by cornflakes. Well, because I had a lot of boxes in my pantry! No compromise in taste though. After all, hubby dear has stopped sneaking out now!


Ingredients:
Cornflakes                         3 cups
Mustard Oil                        8 tablespoons
Roasted Peanuts                 1/2 cup
Sprouted Kala Chana         1/2 cup
Onion                                 1, finely chopped
Green chillies                     4, finely chopped
Red Chilli Powder             1/2 tsp
Chaat Masala                     6 teaspoons
Coriander                           3 teaspoons, chopped

Method:
 Heat the oil in a wok. Add the cornflakes and fry stirring continuously till just golden around the edges. Take off the heat. Add the rest of the ingredients. Adjust the seasoning as per your taste, Garnish with coriander, and serve!

Saturday, October 31, 2015

Besan Laddoos

It was the summer of '88. My uncle was home from his training academy and my grandmum had spent most of her waking hours in the kitchen. She lovingly doled out all his favourite dishes, and cooked enormous amounts of sweets and savouries for him to carry back. One of the many snacks in his care package was Besan Laddoo. These melt in the mouth balls of sweet, addictive goodness were the perfect pop for a quick dessert fix.
When the time finally came for his departure, and all the goodies were being packed, my granny realized something was amiss. The box of laddoos seemed much lighter than she expected. When she opened it, she was aghast! The box was completely empty! Not a crumb in sight. Uh-Oh! It was confession time! Over the past few days I had snuck into the kitchen at every possible opportunity, and popped a couple of them. And before I knew it, well, the seemingly endless supply ran out! In my defence, there were only 50!
Fast forward to the present. Hubby dear is as fond of these laddoos as I am. So I borrowed this recipe from granny. It is a healthier alternative to the traditional ghee dripping, syrup soaked ones. And as I watch the lil one sneak one into his mouth, I know we don't stand a chance! So I am gonna quickly type this out and go grab one while they are still around!


Ingredients:

Besan                    3/4 cup
Melted Ghee         1/2 cup + 1 teaspoon
Sugar                    1/2 cup
Semolina              1/4 cup
Green cardamom     5

Method:

Powder the sugar along with the cardamoms and keep aside. Heat 1 teaspoon of ghee in a wok and roast the semolina till golden, but not brown. Empty onto a plate. Now heat the rest of the ghee in th wok and add the besan. Cook on high flame till darkens and turns red. Take care it doesn't burn, so keep stirring continuously. Add it to the semolina on the plate. Spread this mixture and let it cool till it is luke warm. Now add the powdered sugar. Shape into balls, and pop one for instant gratification ;)